
A Clinician's Guide to the Vertical Jump Mat Test Protocol
Team Meloq
Author
A vertical jump mat test is a method used to assess an individual's lower-body explosive power. It employs a pressure-sensitive mat to measure "flight time"—the duration an athlete is airborne. This measurement is then used in a physics-based calculation to determine vertical jump height. As a rapid, objective, and reliable assessment tool, it has become a staple in settings ranging from physiotherapy clinics to high-performance sports facilities.
This straightforward assessment provides powerful data that goes far beyond simple observation, offering a window into neuromuscular function.
Why the Vertical Jump Test Is a Clinical Standard
In a field with numerous complex assessments, the vertical jump test remains a cornerstone because it offers direct insight into an individual's neuromuscular system. For clinicians and coaches, this is not merely about measuring how high someone can jump. It is about quantifying lower body power, a critical variable for both peak athletic performance and injury rehabilitation.
Modern technology has significantly enhanced this classic assessment. The test, first described by Dudley Sargent in 1921, has been transformed by digital jump mats into a rapid and repeatable power assessment suitable for contemporary clinical workflows (1). While early methods relied on chalk marks or mechanical devices with questionable reliability, modern mats simply detect the moments of take-off and landing. From there, they use flight time to calculate jump height with precision. The physics-based formula for this calculation is detailed in scientific literature, such as in this study (2).
The Power of Objective Data
Guesswork has no place in high-stakes clinical decisions, such as clearing an athlete for return to sport. The primary value of a vertical jump mat test lies in its objectivity. It replaces subjective observation with quantitative data, providing a solid baseline against which progress can be measured.
This data-driven approach is fundamental to effective practice, allowing practitioners to:
- Track Neuromuscular Readiness: A sudden drop in jump height can be an early indicator of fatigue or overtraining, enabling intervention to prevent potential injuries.
- Monitor Rehabilitation Progress: A systematic increase in jump height following an injury provides clear, motivating evidence that a rehabilitation program is effective.
- Identify Asymmetries: By testing each leg individually, it is possible to pinpoint strength imbalances that might otherwise go unnoticed—a significant factor in injury prevention.
The objective is not just to measure a single jump but to build a performance profile over time. Consistent testing with a reliable tool provides the context needed to understand an individual’s capabilities and limitations.
A Versatile Tool for Various Settings
The simplicity and portability of modern jump mats make them an incredibly versatile tool. They are equally effective in a busy physiotherapy clinic, on the sidelines of a sports field, or in a high-performance training facility.
This accessibility means high-quality data can be gathered wherever the athlete is, without the need for a full-scale biomechanics laboratory.
Ultimately, the vertical jump mat test offers a powerful, efficient, and scientifically sound method for assessing a key component of human movement. By understanding the importance of objective measurements in our detailed article, practitioners can make more informed decisions. This foundation sets the stage for implementing a standardized protocol that ensures every test is meaningful.
Setting the Stage for a Flawless Jump Assessment
Inaccurate data is not useful. To derive value from a vertical jump test, it is essential to establish a controlled and repeatable environment. This involves more than placing equipment on the floor; it requires a systematic process to ensure that every assessment—from baseline to follow-up—is truly comparable.
The surface is a foundational detail. The jump mat should always be placed on a firm, level floor. Soft or uneven surfaces, such as plush carpet or padded gym flooring, can absorb force. This can alter take-off and landing mechanics, introducing variability into the data. A quick check with a level is a simple but important step.
Once the mat is in position, calibration is non-negotiable. Most modern jump mats feature a simple calibration or “zeroing” function that must be performed before each testing session. This step sets the system’s sensors to the athlete's resting body weight, which is critical for the mat to accurately identify the precise moments of take-off and landing.
Preparing the Athlete for Peak Performance
With the equipment ready, attention turns to the athlete. A standardized warm-up is not just for safety; it is crucial for performance. Priming the neuromuscular system for a maximal effort requires that every individual undergoes the same preparation protocol every time.
An effective warm-up protocol does not need to be lengthy. A sound structure includes:
- General Mobilization: Begin with 5-10 minutes of light aerobic activity. A stationary bike or light jogging can increase blood flow and raise core temperature.
- Dynamic Stretching: Focus on movements that take the lower body through its full range of motion. Examples include leg swings (forward and side-to-side), walking lunges with a torso twist, and hip circles.
- Activation and Potentiation: Conclude with several submaximal jumps. Have the individual perform three to five jumps at approximately 50-75% of their perceived maximal effort. This helps them acclimatize to the specific movement pattern without inducing fatigue.
For athletes aiming to improve their explosive power, regularly incorporating plyometric exercises into their training is a widely recommended strategy.
The Art of Clear Instruction
The way the test is explained is as important as its execution. Instructions must be clear, concise, and identical for every person, every time. Ambiguity can lead to technical variations that compromise data integrity.
Explain the specific jump being performed (e.g., Countermovement Jump) and demonstrate it if necessary. Ensure the athlete understands key rules, such as keeping hands on hips for an arms-restricted test or the importance of landing on the same spot from which they took off.
A simple cue often used is, "Jump as high and as fast as you can." This is typically sufficient to elicit maximal intent. Avoid over-coaching, as excessive thinking can interfere with a natural, explosive movement.
Adhering to these setup steps transforms the vertical jump mat test from a simple measurement into a powerful assessment tool. Combining a meticulously prepared environment, a standardized warm-up, and clear instructions creates the consistency needed for valid and reliable data. This attention to detail allows for confident tracking of an athlete's progress.
For those interested in the technology, our guide on understanding force measurement equipment provides context on the principles behind these tools.
With the testing environment and athlete prepared, it is time to proceed with the vertical jump protocol. A robust assessment involves more than a single jump. To build a comprehensive picture of an athlete’s neuromuscular capabilities, several jump variations should be examined.
The three foundational tests are the Countermovement Jump (CMJ), the Squat Jump (SJ), and the Drop Jump (DJ). Each provides a different perspective on lower body function. The CMJ assesses the use of elastic energy, the SJ isolates concentric power, and the DJ evaluates reactive strength. Performing these three tests correctly will yield a rich dataset to guide clinical decisions.
Before starting, ensure this simple, repeatable flow is followed.
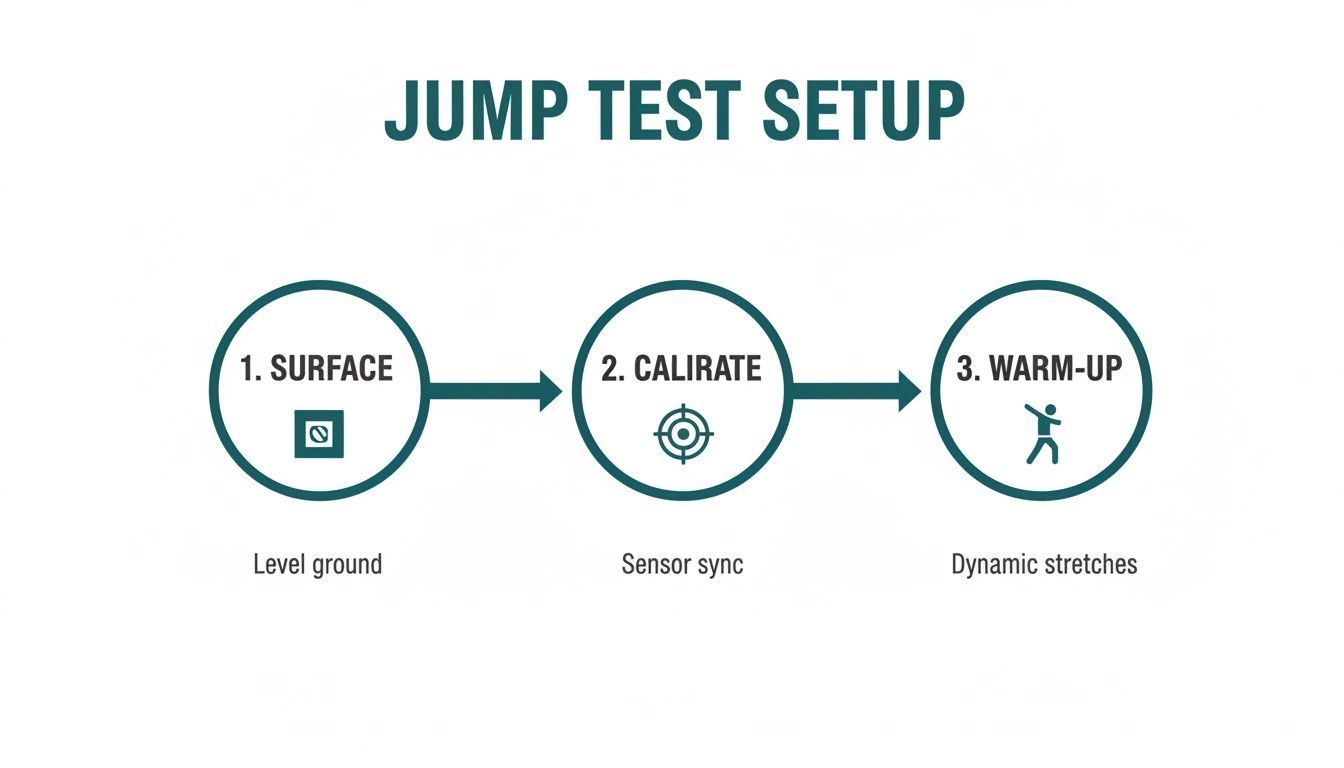
This process is fundamental. A level surface, a calibrated mat, and a standardized warm-up form the bedrock of reliable data.
The Foundational Jump Tests
Let's examine the "big three" of jump testing. While they may appear similar, each reveals unique information about how an individual generates force. Understanding these nuances is what distinguishes basic data collection from expert analysis.
| Jump Type | Primary Purpose | Key Execution Cue | Metrics Assessed |
|---|---|---|---|
| Countermovement Jump (CMJ) | Measures explosive power using stored elastic energy (slow SSC). | "Dip down fast, then explode up." | Peak jump height, power, take-off velocity. |
| Squat Jump (SJ) | Isolates pure concentric strength, removing elastic contribution. | "Hold the squat, then jump from that static start." | Concentric power, rate of force development (RFD). |
| Drop Jump (DJ) | Assesses reactive strength and fast SSC efficiency. | "Step off, land, and spring back up instantly." | Reactive Strength Index (RSI), ground contact time. |
Mastering the execution and interpretation of these three jumps provides a multi-dimensional view of an athlete's power profile, helping to pinpoint specific strengths and weaknesses to target in their training or rehabilitation program.
Countermovement Jump (CMJ)
The CMJ is the most common jump test. It is widely used in clinical and elite performance settings because it closely mimics the natural jumping movements found in most sports.
To perform a CMJ, the individual stands tall on the center of the mat. On cue, they perform a rapid dip into a squat position and immediately reverse the motion, exploding upward into a maximal jump. This rapid "dip-and-drive" engages the stretch-shortening cycle (SSC), where muscles are rapidly stretched eccentrically before contracting concentrically. An individual's ability to utilize this cycle is a key indicator of their power.
A crucial procedural decision is whether to test with or without an arm swing. Using a "hands-on-hips" variation isolates the lower body's contribution, while allowing an arm swing measures total-body explosive ability. Neither is incorrect, but consistency is essential. The chosen method must be used for all future tests to ensure data comparability.
Squat Jump (SJ)
The Squat Jump strategically removes the "countermovement" from the equation. The purpose of the SJ is to isolate the athlete's concentric power—their ability to produce force without the assistance of stored elastic energy.
For the SJ, the individual squats to a specific depth (a 90-degree knee angle is a common standard) and holds the position for a 2-3 second pause. This pause is mandatory, as it dissipates the elastic energy. From that static start, they jump for maximum height.
A valuable analysis involves comparing SJ height to CMJ height. A significantly higher CMJ suggests the athlete is proficient at utilizing elastic energy. If the numbers are very close, it may indicate an opportunity to improve their SSC efficiency. This comparison, a key component of the "Bosco test," provides insight into an athlete's neuromuscular characteristics (3).
Drop Jump (DJ)
The Drop Jump is a more advanced protocol designed to measure reactive strength. This is the ability to absorb force upon landing and immediately redirect it into an explosive jump, a skill crucial for sports involving rapid cuts and changes of direction. It is a true test of the fast SSC.
To perform a DJ, the individual steps off a box (typically 20-40 cm high) onto the mat. The instant their feet touch the ground, they must explode into a maximal vertical jump. The cue is critical: "Spend as little time on the ground as possible." The objective is to minimize ground contact time while maximizing jump height.
For all three jump types, it is recommended to perform 3-5 maximal-effort repetitions, with 30-60 seconds of rest between each jump. This ensures the capture of true peak performance, rather than the effects of fatigue. Once solid data is collected, you can precisely measure vertical leap performance and translate those numbers into actionable insights.
Translating Jump Mat Data Into Clinical Insights
Collecting data with a vertical jump mat is the first step. The real skill lies in interpreting the story the numbers tell. Transforming raw data into actionable clinical insights is what elevates an assessment from good to great. It is about understanding the "why" behind an athlete's performance.
This involves moving beyond simply measuring jump height to building a complete profile of explosive power. Key metrics such as Jump Height, Flight Time, and the Reactive Strength Index (RSI) are all critical pieces of this puzzle. Each offers a unique window into an athlete's neuromuscular function.
Decoding the Core Metrics
Jump mat systems derive most of their insights from one simple measurement: Flight Time. This is the duration, in milliseconds, that an individual is airborne. From this single data point, the system can accurately calculate Jump Height, the metric most people intuitively understand.
However, the analysis should not end there. By combining flight time with ground contact time during specific tests like the Drop Jump, we can calculate the Reactive Strength Index (RSI). This metric (calculated as Jump Height / Ground Contact Time) is an excellent indicator of an athlete's ability to absorb and redirect force quickly—a quality often termed reactive strength.
A high jump achieved with a long ground contact time tells a very different story than the same height achieved with minimal ground contact. The former suggests good raw strength but poor reactivity, while the latter indicates an efficient and "springy" neuromuscular system.
Building a Complete Athlete Profile
The true power of jump mat testing emerges when comparing different jump variations. Looking at metrics in isolation provides a snapshot, but comparing them reveals an athlete's unique power signature.
Consider this common scenario: An athlete's Countermovement Jump (CMJ) height improves significantly after a training block, but their Squat Jump (SJ) height remains unchanged. This tells us:
-
CMJ Improvement: Their ability to use the stretch-shortening cycle has improved. They are more efficient at generating power from stored elastic energy.
-
Stagnant SJ: Because the Squat Jump isolates concentric force production, a lack of improvement suggests their underlying concentric strength has not changed significantly.
This insight is incredibly valuable. It suggests that their next training block might benefit from a focus on developing concentric strength through exercises like heavy squats or deadlifts, rather than continuing to focus on plyometrics. To delve deeper, one might also explore the rate of force development for a more complete picture of explosive strength.
The Importance of Context and Normative Data
A jump height of 50 cm may be exceptional for one individual but below average for another. Context is crucial. Normative data serves as an essential tool for benchmarking performance and setting realistic goals.
While specific population data is always best, here are some general reference values from established literature to help contextualize results for non-elite populations (4, 5).
General Normative Vertical Jump Height Data (in cm)
| Population | Male (Untrained) | Female (Untrained) | Male (Trained) | Female (Trained) |
|---|---|---|---|---|
| General Adult | 40–50 cm | 30–40 cm | 60–70 cm | 50–60 cm |
As indicated, the differences can be significant. Untrained males typically jump around 40–50 cm (16–20 in), while untrained females average 30–40 cm (12–16 in). With structured training, these numbers can increase substantially, with trained males reaching 60–70 cm (24–28 in) and trained females 50–60 cm (20–24 in). These values can help frame results and manage expectations, but should be used with caution, recognizing the wide variability between individuals and sports.
Tracking Change Over Time
Ultimately, the most valuable application of a jump mat is tracking an individual's progress against their own baseline. A single test is a data point; multiple tests over time reveal a trend.
This longitudinal approach allows you to:
- Validate Interventions: Obtain objective proof that a rehabilitation or training program is effective.
- Identify Plateaus: Pinpoint when progress stalls, signaling the need to adjust programming.
- Detect Fatigue: An unexplained drop in performance can be an early warning sign of overtraining, allowing for intervention before an injury occurs.
By combining a solid understanding of core metrics, comparing different jump types, and using normative data for context, a simple jump test can be transformed into a deep, insightful analysis of an individual's athletic capabilities.
Avoiding Common Pitfalls to Ensure Data Integrity
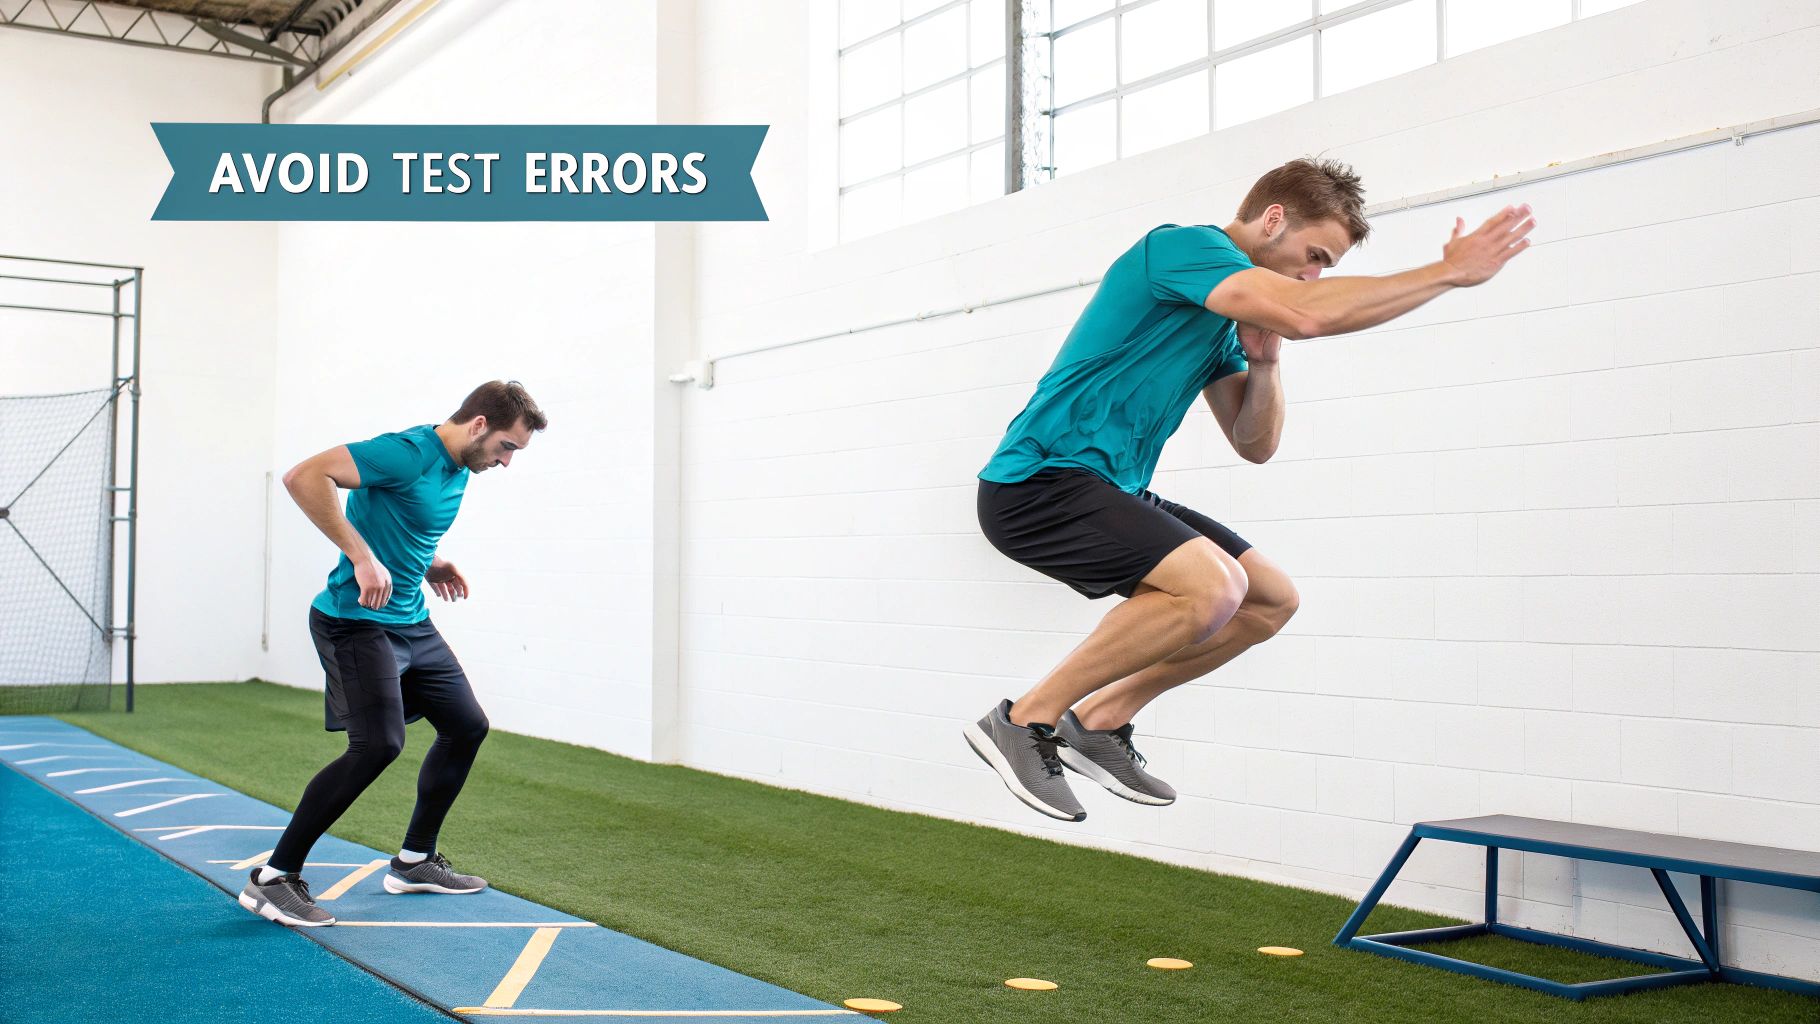
Even with excellent equipment, small details can compromise data quality. To obtain clean, actionable insights from a vertical jump mat, it is crucial to avoid common errors that range from equipment characteristics to inconsistencies in athlete technique.
A frequent topic of discussion is how jump mats compare to the "gold standard" of force plates. It is important to acknowledge that jump mats, which calculate jump height from flight time, can have a systematic bias compared to force plates, which measure ground reaction forces directly.
For instance, one study found that a specific jump mat overestimated vertical jump height by approximately 1.55 cm on average compared to a force plate (2). However, the key finding was that this difference was remarkably consistent. This highlights that while a jump mat may not yield the exact same value as a force plate, it is highly reliable for its primary purpose in a clinical or field setting: tracking change over time. You can learn more about the findings on jump mat and force plate comparisons and understand why consistency is what truly matters (2).
The main takeaway is that consistency trumps absolute accuracy. Using the same device and protocol for every test with an individual ensures that any observed change reflects a true physiological adaptation, not methodological noise.
Troubleshooting Common Testing Mistakes
Beyond equipment considerations, several common athlete errors can introduce variability into the data. Identifying and correcting these is a critical skill.
A frequent issue is an inconsistent arm swing during a Countermovement Jump (CMJ). If the protocol includes an arm swing, it must be performed with similar effort and technique on every repetition. A sub-maximal swing on one jump followed by a maximal effort on the next will produce variable heights unrelated to lower body power.
Another classic error, especially with fatigued athletes, is tucking the legs in flight. When an athlete pulls their knees toward their chest in mid-air, it delays their landing. Because jump mats calculate height from flight time, this action artificially inflates the measurement, suggesting a higher jump than was actually achieved.
Practical Solutions for Cleaner Data
For every common error, there is a simple, practical solution to improve the quality of your vertical jump tests.
To address inconsistent arm swing:
- Standardize Your Protocol: Decide at the outset whether you will test with arms fixed (hands on hips) or with a free arm swing, and adhere to that decision.
- Give a Clear Cue: If allowing an arm swing, use a consistent cue like, "Swing your arms down and back as you dip, then drive them up forcefully as you jump."
- Consider "Hands-on-Hips": To isolate lower-body output and remove a variable, the "hands-on-hips" protocol is often the most reliable choice, particularly in a rehabilitation setting.
To prevent leg tucking:
- Coach the Landing: Before the jump, instruct the athlete to land with their legs relatively straight (but not locked) and to absorb the force by bending their knees after they touch down.
- Use Visual Cues: A simple instruction like "Reach for the ceiling and land tall" can encourage a more extended body position in the air.
- Discard Bad Reps: If you clearly observe a significant leg tuck, make a note and discard that trial. It is better to have fewer valid repetitions than a dataset compromised by invalid ones.
Finally, never underestimate the impact of insufficient rest. A maximal explosive effort requires a recovered neuromuscular system. Ensure athletes have at least 30-60 seconds of rest between jumps to prevent fatigue from confounding the results. By managing these details, you can be confident that each data point is a true reflection of the athlete's ability.
Your Questions on Vertical Jump Mat Testing Answered
Even with a robust protocol, questions can arise during a busy day. Here are answers to some of the most common queries to help you conduct jump tests with confidence.
How Often Should I Test an Athlete or Patient?
The optimal testing frequency depends on the context. For a healthy athlete in a training block, re-testing every 4-6 weeks is a suitable interval. This period is generally long enough to observe meaningful physiological adaptations.
In a rehabilitation setting, it is often more logical to test at key clinical milestones, such as before advancing to a new phase of a program or as part of a final return-to-sport testing battery.
Testing too frequently should be avoided. Weekly testing, for instance, can produce "noisy" data, as day-to-day neuromuscular fatigue can obscure true changes in performance. The goal is to establish a clean baseline and then re-test under identical conditions at meaningful intervals.
What Is the Real Difference Between a Jump Mat and a Force Plate?
The primary distinction is between practicality and precision. A jump mat is a practical tool—it is portable, affordable, and provides rapid jump height calculations from flight time. For most day-to-day clinical and field applications requiring quick, reliable data, it is an excellent choice.
A force plate, conversely, is the laboratory "gold standard." It directly measures the ground reaction forces that produce the jump, providing deeper kinetic data that a mat cannot, such as rate of force development (RFD) and peak power.
While force plates offer a richer dataset, jump mats are highly reliable for tracking changes in jump height over time. For many practitioners, monitoring this longitudinal progress is the most critical application, making the jump mat an effective and accessible option.
Can I Use This Test to Measure Limb Asymmetry?
Yes, and this is one of its most powerful applications in a rehabilitation setting. While a standard two-footed jump does not reveal imbalances, single-leg jumps can be easily added to the protocol.
The process is straightforward: have the client perform a set of maximal jumps on their right leg, then repeat the same number on their left. By comparing the average or peak jump height between limbs, you can calculate a limb symmetry index (LSI).
A difference of more than 10-15% is often considered a clinically significant deficit and is a key metric in guiding return-to-sport decisions following a lower-body injury (6). A consistent single-leg testing process is therefore highly valuable.
What Should I Do if My Client's Jumps Are Inconsistent?
First, recognize that inconsistency can be an important finding in itself, often pointing to a breakdown in protocol, technique, or motor control. Your first step should be to audit your own process. Was the warm-up identical? Are your verbal cues and rest periods consistent for every repetition?
Next, observe their form closely. Variability in countermovement depth, arm swing, or landing strategy can all degrade data quality. Often, providing simple, repeatable cues and allowing for a few extra practice repetitions is sufficient to improve consistency.
However, if variability persists despite a tight protocol, it may signal an underlying issue such as poor neuromuscular control or lingering fatigue. This is not a failed test—it is a valuable insight that should directly inform your programming and coaching.
References
- Sargent DA. The physical test of a man. American Physical Education Review. 1921;26(4):188-94.
- Nuzzo JL, Anning JH, Scharfenberg JM. The reliability of the Vertec® in the assessment of vertical jump height in children and adults. Measurement in Physical Education and Exercise Science. 2011;15(3):209-17. Available from: https://pmc.ncbi.nlm.nih.gov/articles/PMC4691308/
- Bosco C, Luhtanen P, Komi PV. A simple method for measurement of mechanical power in jumping. European journal of applied physiology and occupational physiology. 1983;50(2):273-82.
- Markovic G, Dizdar D, Jukic I, Cardinale M. Reliability and factorial validity of squat and countermovement jump tests. Journal of strength and conditioning research. 2004;18(3):551-5.
- Asadi A, Arazi H, Young WB, Sáez de Villarreal E. The effects of plyometric training on change-of-direction ability: A meta-analysis. International journal of sports physiology and performance. 2016;11(5):563-73.
- Grindem H, Snyder-Mackler L, Moksnes H, Engebretsen L, Risberg MA. Simple decision rules can reduce reinjury risk by 84% after ACL reconstruction: the Delaware-Oslo ACL cohort study. British journal of sports medicine. 2016;50(13):804-8.
At Meloq, we build tools that help you move from subjective feelings to objective, quantified data. Our ecosystem of portable devices, from force plates to dynamometers, delivers the hard numbers you need to make confident clinical decisions and get better outcomes. See how our tools can elevate your practice by visiting https://www.meloqdevices.com.

Featured Product
EasyBase Force Plates
Portable dual force plate system for jump testing, balance & rehab. No subscription fees.
Learn More