
A range of motion test is one of the most fundamental assessments in clinical practice. It measures the total movement available at a specific joint—such as a shoulder or knee—to quantify its flexibility and identify any limitations. This objective data is crucial for diagnosing injuries, developing effective rehabilitation plans, and tracking a patient's progress over time.
Why Accurate Range of Motion Testing Is a Clinical Game Changer
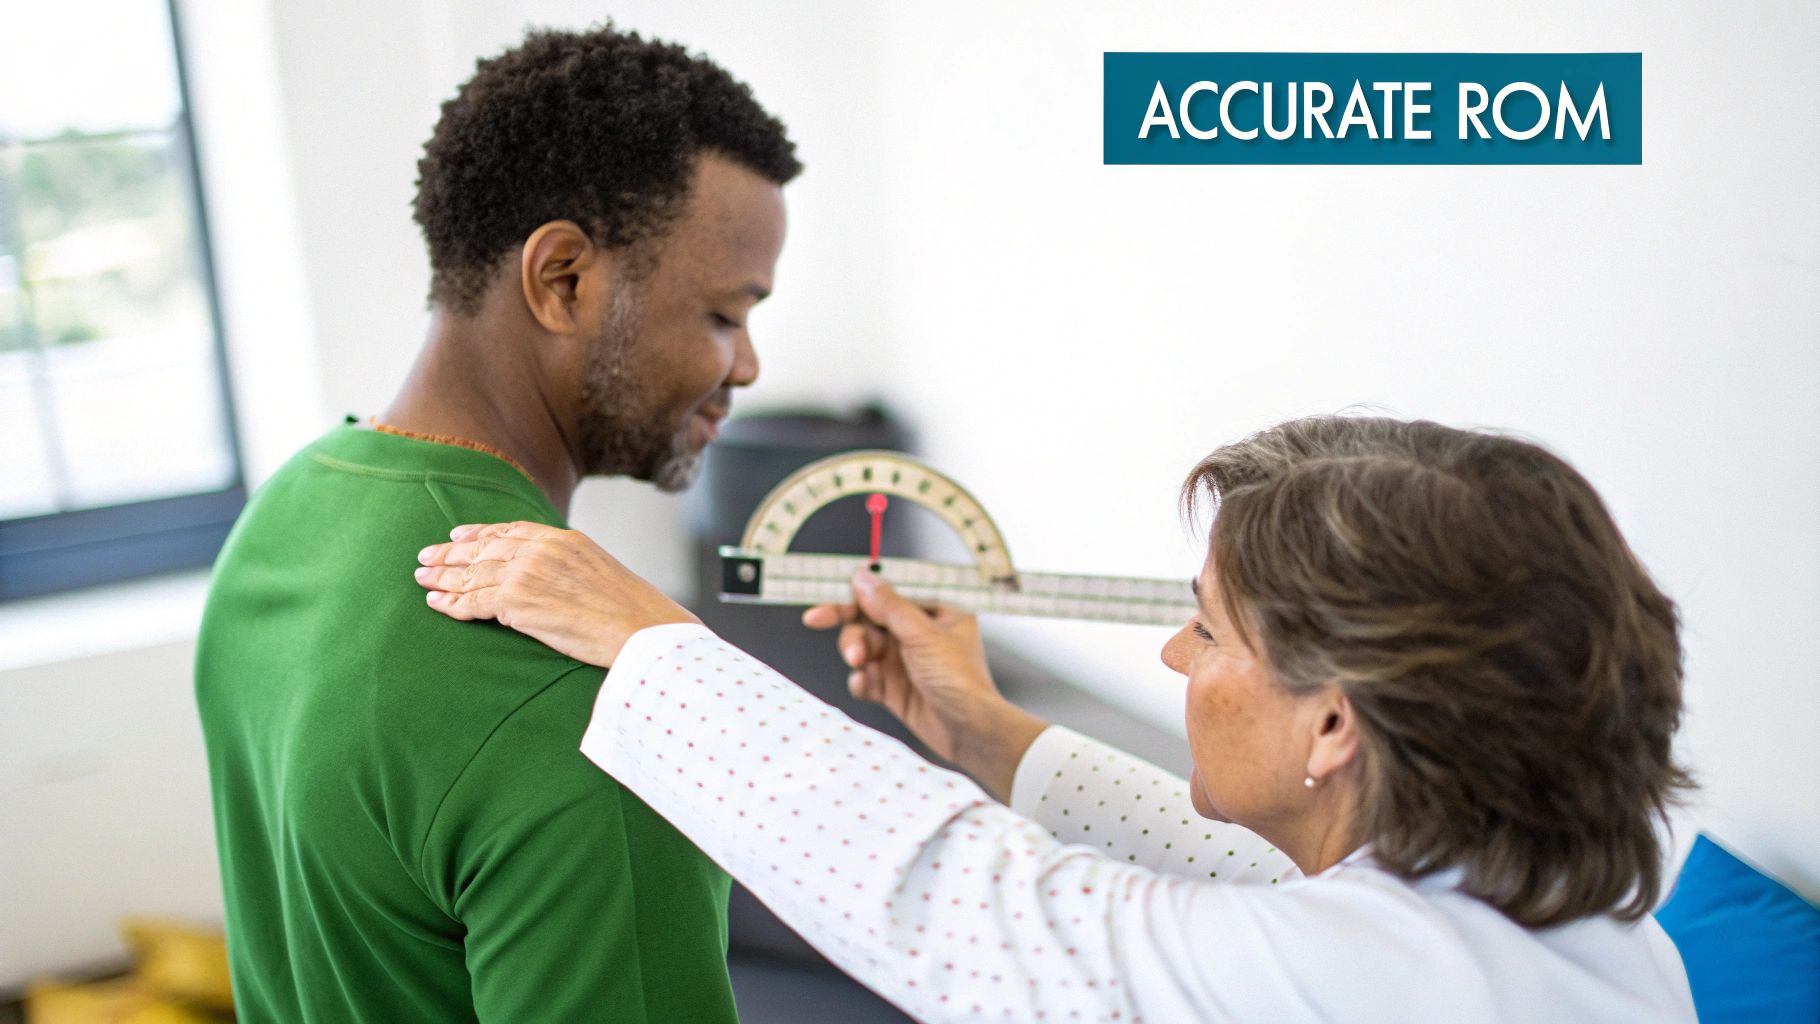
In modern musculoskeletal care, simply "eyeballing" a patient's movement is no longer sufficient. Effective treatment plans, successful rehabilitation programs, and critical return-to-sport decisions all rely on objective, quantifiable data.
This evidence-based approach is foundational for several key reasons. First and foremost, it establishes a clear, unbiased baseline at the start of care. This initial measurement becomes the benchmark against which all future progress is measured, providing both the clinician and the patient with tangible proof of improvement.
From Visual Estimates to Standardized Measurement
Historically, assessing joint movement was more of an art than a science. Clinicians often relied on visual approximation, a method now understood to be prone to significant inconsistencies between practitioners (1).
The push toward standardization gained momentum in the mid-20th century as research began to highlight these reliability issues. In 1965, the American Academy of Orthopaedic Surgeons (AAOS) published its Method of Measuring and Recording, establishing a new standard for clinical practice that promoted consistency and accuracy (2).
The table below provides a brief overview of how assessment methods have evolved.
The Evolution of ROM Assessment Methods
| Method | Primary Technique | Key Limitation | Era |
|---|---|---|---|
| Visual Estimation | Subjective observation of joint movement | High inter-rater variability, no data | Pre-1950s |
| Manual Goniometry | Using a protractor-like tool to measure joint angles | Prone to human error, time-consuming | 1960s - Present |
| Inclinometers | Gravity-based or fluid-filled measurement devices | Limited to certain planes of motion | 1980s - Present |
| Digital Goniometers | Electronic devices providing instant digital readouts | Improved accuracy, faster workflow | 2000s - Present |
| Portable IMU Tools | Inertial Measurement Units for dynamic, multi-plane tracking | High precision, objective, efficient | 2010s - Present |
This evolution reinforces a core principle in evidence-based practice: what gets measured gets managed. Objective data empowers clinicians to:
- Design targeted interventions. Knowing the exact degree of limitation helps pinpoint the specific tissues or structures that require attention.
- Build patient trust and motivation. When a patient sees objective evidence that their knee flexion has improved by 15 degrees, it provides powerful motivation to adhere to their rehabilitation plan.
- Provide concrete evidence. Precise measurements are essential for justifying treatment to insurance providers and for medico-legal documentation.
Accurate ROM data transforms a subjective observation into an objective finding. It is the difference between saying "the shoulder seems a bit stiff" and stating "shoulder abduction is limited to 95 degrees, a 40-degree deficit compared to the contralateral side."
The Bedrock of Clinical Decision-Making
Ultimately, a reliable range of motion test is the bedrock for countless clinical decisions. It helps determine a patient's true functional capacity and provides the insights needed to guide their recovery safely and effectively. For a deeper understanding of how this data is defined and interpreted, you can explore this detailed guide on normative ROM data.
The ongoing shift from traditional goniometers to advanced digital tools is refining this process even further, bringing greater accuracy and efficiency into clinical practice.
References
- Gajdosik RL, Bohannon RW. Clinical measurement of range of motion. Review of goniometry emphasizing reliability and validity. Phys Ther. 1987;67(12):1867-1872.
- American Academy of Orthopaedic Surgeons. Joint Motion: Method of Measuring and Recording. Chicago, IL: American Academy of Orthopaedic Surgeons; 1965.
Setting the Stage for an Accurate Assessment
The quality of collected data is only as good as the process used to obtain it. For a range of motion test, this process begins long before a measurement tool is used. Creating a controlled setting and communicating clearly are non-negotiable for achieving measurements that are both accurate and repeatable.
A calm, professional environment helps put the patient at ease, reducing apprehension that can lead to muscle guarding and artificially limited movement. The primary goal is to build sufficient trust to observe a true representation of their functional capacity.
Creating the Optimal Testing Space
The physical setup is a critical piece of the puzzle. The examination surface, typically a plinth or treatment table, must be firm and stable. Attempting to measure on a soft surface can introduce subtle body shifts that compromise the accuracy of the readings.
Sufficient space is also necessary to allow for unrestricted movement. A cramped environment can prevent full shoulder abduction or hip extension, skewing results. Ensure there is enough clearance for the patient to move their limbs through their entire available range.
Finally, consider the room's ambient conditions. Good lighting is essential for identifying anatomical landmarks, and a comfortable temperature is equally important. A patient who is cold or uncomfortable may be unable to relax enough for a true passive measurement.
The Critical Role of Communication and Positioning
Instructions should be simple and direct. Walking the patient through the procedure demystifies the process and helps them understand their role. Avoiding clinical jargon can significantly improve patient cooperation.
Instead of saying, "I'm going to assess your glenohumeral joint's passive external rotation," try something more accessible: "I'm going to gently move your arm outward to see how your shoulder is moving. Please let your arm relax and allow me to do all the work."
This small shift in language makes a world of difference. It encourages the patient to relax fully, preventing them from either resisting or attempting to "assist" during a passive test.
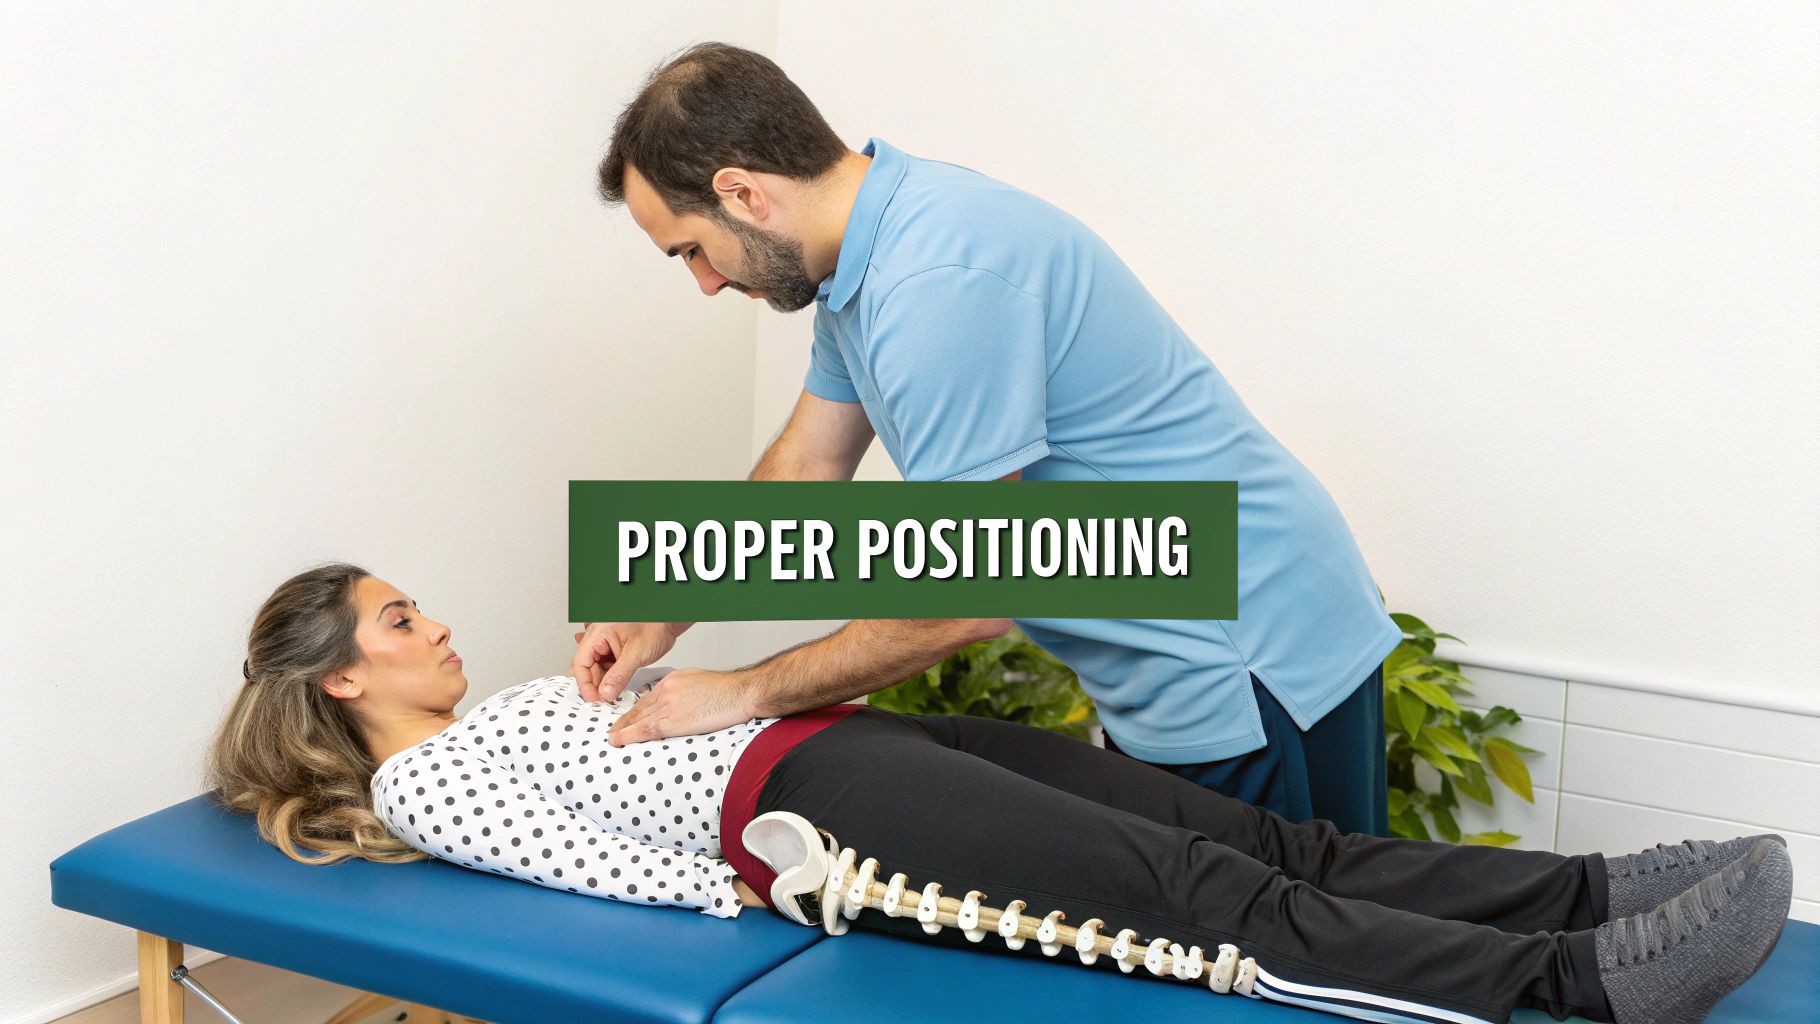
Stabilization Isolates the True Movement
Proper positioning and stabilization are arguably the most important technical skills in ROM testing. Without them, the body will naturally compensate for limited movement, invalidating the results. The focus should always be on isolating movement to a single joint.
Common compensations include:
- Shoulder Abduction: A patient may elevate their entire shoulder girdle or tilt their trunk to create the illusion of more shoulder joint motion than is actually present.
- Hip Flexion: A posterior pelvic tilt is a classic compensatory movement during hip flexion assessment. This can add a misleading 10-20 degrees to the measurement, potentially masking a true hip flexion contracture (1).
To prevent these workarounds, use a firm hand, a strap, or your own body to stabilize the segments proximal to the joint being measured. This ensures that you are measuring pure, isolated joint motion. Before aligning the goniometer, take time to palpate and clearly identify bony anatomical landmarks, as this forms the foundation for capturing trustworthy data.
References
- Clarkson HM. Musculoskeletal Assessment: Joint Range of Motion and Manual Muscle Strength. 3rd ed. Philadelphia, PA: Lippincott Williams & Wilkins; 2013.
Mastering Measurement Techniques for Major Joints
Once the patient is positioned correctly, the focus shifts to measurement. Precision and consistency are paramount, whether assessing what the patient can do actively or what can be achieved passively. Standardized procedures for testing major joints—shoulder, hip, knee, and ankle—are essential for obtaining reliable data.
The distinction between Active Range of Motion (AROM) and Passive Range of Motion (PROM) is fundamental. AROM, what the patient achieves with their own muscle power, provides information about functional ability and willingness to move. PROM, where the clinician moves the joint through its range, offers a clearer picture of the joint's true mechanical mobility and the nature of any restrictions.
The Shoulder Complex: A Foundational Assessment
The glenohumeral joint's high degree of mobility makes it challenging to assess accurately. A meticulous approach is required to isolate specific movements and prevent common compensations.
-
Flexion and Extension: For flexion, a supine position helps stabilize the spine. Placing one hand on the scapula prevents elevation or rotation that could falsely inflate the reading. The goniometer's axis is placed on the lateral aspect of the greater tubercle of the humerus. The stationary arm aligns with the trunk's mid-axillary line, and the movable arm follows the humerus.
-
Abduction: With the patient supine and the arm in neutral rotation (thumb pointing up), firmly stabilize the lateral border of the scapula and clavicle. This prevents trunk leaning or shoulder shrugging. Goniometer placement is the same as for flexion.
-
External and Internal Rotation: With the patient supine, the shoulder is abducted to 90 degrees and the elbow flexed to 90 degrees. The goniometer's axis is placed over the olecranon process. The stationary arm remains vertical (perpendicular to the floor), while the movable arm follows the ulna during rotation.
Assessing the Hip Joint
Accurate hip measurements are crucial, especially for post-operative patients or athletes where small deficits can impact performance. Research has demonstrated that standardized procedures can yield highly reliable data. For example, a 2012 study of asymptomatic adults found very high intra-rater reliability (ICC > 0.90) for key hip movements when using a standardized protocol (1). To achieve this level of accuracy, stabilization is paramount.
-
Hip Flexion: To prevent posterior pelvic tilt, maintain one hand on the patient’s Anterior Superior Iliac Spine (ASIS) to detect any movement while flexing the hip. The goniometer's axis is placed over the greater trochanter, with the stationary arm aligned with the pelvis and the movable arm tracking the femur.
-
Hip Abduction and Adduction: Stabilize the pelvis to prevent "hip hiking" during abduction or a pelvic drop during adduction. The goniometer's stationary arm should be aligned with an imaginary line connecting both ASISs, while the movable arm follows the midline of the femur toward the patella.
-
Hip Internal and External Rotation: This is often measured with the patient seated, hips and knees at 90 degrees. Stabilize the distal thigh to prevent it from lifting. The axis is placed over the center of the patella, with the stationary arm perpendicular to the floor and the movable arm following the tibia. For a closer look at the tool itself, check out this guide on what a goniometer is used for.
The Knee: A Hinge Joint Examination
While the knee primarily flexes and extends, accuracy remains vital, particularly following procedures like ACL reconstruction or total knee arthroplasty.
Clinical Insight: During PROM, always assess the "end-feel." A sudden, hard stop in knee extension is a normal bony end-feel. A firm, leathery resistance during hip rotation suggests capsular tightness (a firm end-feel). A mushy sensation stopping movement before the end of the range could indicate edema (a soft end-feel). These tactile cues provide valuable diagnostic information.
For knee flexion, the patient can be supine or prone. The prone position can help limit compensatory hip movement. The goniometer's axis is placed over the lateral epicondyle of the femur, with the stationary arm aligned with the greater trochanter and the movable arm following the lateral malleolus.
The Ankle: Testing Functional Movement
Ankle mobility, particularly dorsiflexion, is critical for functional movements like squatting and walking.
To measure dorsiflexion accurately, the patient should be seated or supine with the knee flexed to approximately 20-30 degrees. This relaxes the gastrocnemius muscle, which crosses both the knee and ankle joints, allowing for a true measurement of talocrural joint motion. Testing with the knee straight primarily assesses gastrocnemius length, which is a different evaluation.
The standardized setup for ankle dorsiflexion and plantarflexion is as follows:
- Positioning: Patient seated with the knee bent over the edge of a table, or supine with a small roll under the knee.
- Stabilization: Gently stabilize the tibia and fibula to prevent compensatory movements at the knee or hip.
-
Goniometer Placement:
- Axis: Placed over the lateral malleolus.
- Stationary Arm: Aligned with the fibular head.
- Movable Arm: Aligned parallel to the fifth metatarsal.
By adhering to these standardized protocols, clinicians can ensure that every range of motion test yields data that is accurate, repeatable, and clinically meaningful.
References
- Pua YH, Wrigley TV, Cowan SM, Bennell KL. Intrarater test-retest reliability of hip range of motion and hip muscle strength measurements in persons with hip osteoarthritis. Arch Phys Med Rehabil. 2008;89(6):1146-1154.
Turning Raw Data Into Clinical Insights
Obtaining a measurement in degrees is only the first step. The true clinical skill lies in interpreting what that number means for the individual patient. A raw figure is just data; the clinician's role is to transform it into an insight that shapes treatment plans, sets achievable goals, and tracks meaningful progress.
The initial step is often to compare findings against established normative values. These benchmarks, derived from large-scale studies, provide a general reference for what is considered "normal" for a given joint. However, they are reference points, not rigid rules.
The process below illustrates the three-step foundation for obtaining reliable raw data. When positioning, stabilization, and measurement are performed correctly, the resulting number can be analyzed with confidence.
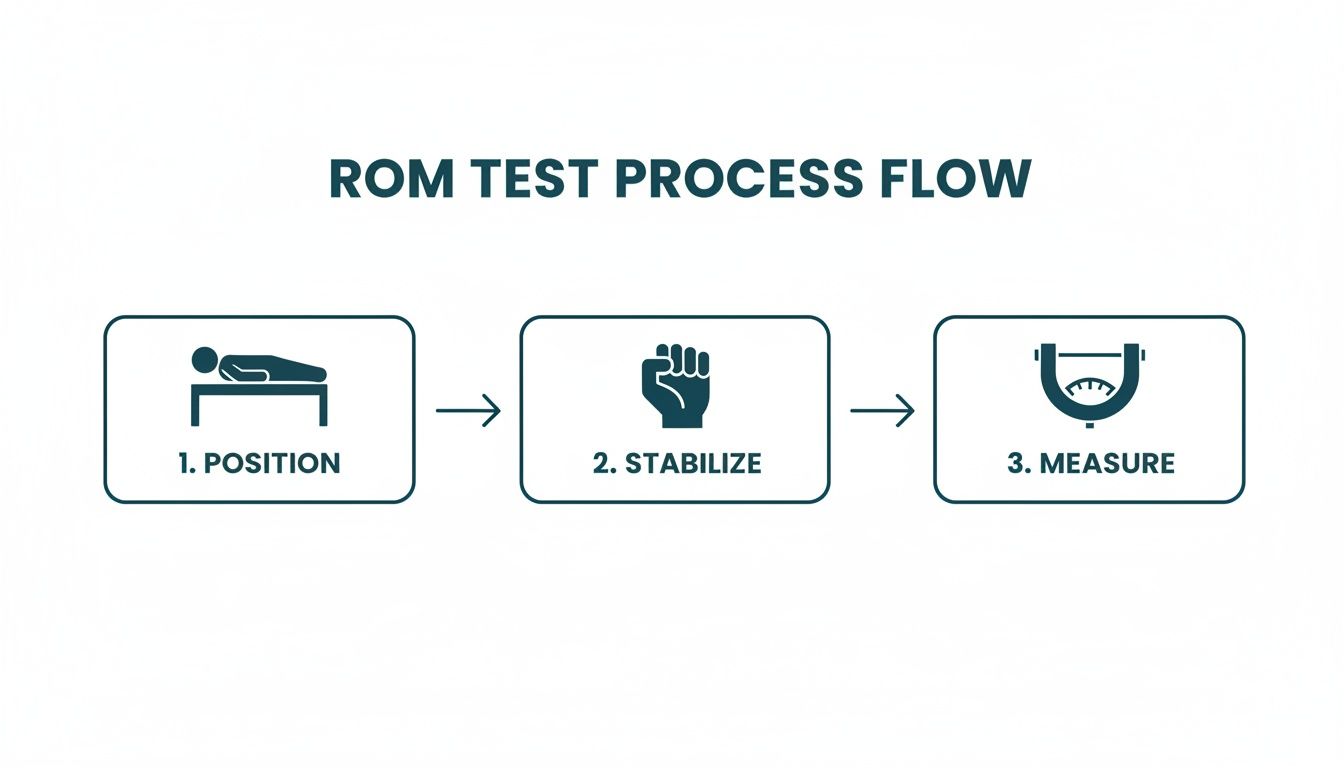
With a reliable measurement in hand, it's time to analyze it within the patient's context.
Understanding Normative Ranges and Patient Context
While normative data provides a baseline, "normal" is highly individual. Factors like age, sex, and activity level significantly influence expected ranges. The "normal" shoulder rotation for an elite gymnast will differ substantially from that of a sedentary office worker of the same age.
For example, the CDC's foundational Normal Joint Range of Motion Study provides robust reference data. This study found that among adults aged 20-29, the mean active hip flexion was 113.6°, while mean active elbow flexion was 141.4° (1). Spotting deviations from such norms can be critical for diagnosis and post-operative monitoring.
Here is a quick reference for some of the most commonly assessed joints.
Normative ROM Values for Major Joints in Adults
| Joint | Motion | Average Normal Range (Degrees) |
|---|---|---|
| Shoulder | Flexion | 0-180° |
| Extension | 0-60° | |
| Abduction | 0-180° | |
| Internal Rotation | 0-70° | |
| External Rotation | 0-90° | |
| Hip | Flexion | 0-120° |
| Extension | 0-30° | |
| Abduction | 0-45° | |
| Adduction | 0-30° | |
| Knee | Flexion | 0-135° |
| Extension | 0-15° | |
| Ankle | Dorsiflexion | 0-20° |
| Plantarflexion | 0-50° | |
| Note: These are general values and can vary based on the source and population (2). |
While these values are a useful starting point, the most powerful comparison is often the patient's own contralateral limb. Comparing the involved side to the uninvolved side provides the most personalized and functionally relevant benchmark. A 15-degree deficit in shoulder external rotation might seem minor against a textbook norm, but if it's 30 degrees less than their dominant, uninjured throwing arm, it tells a much more urgent clinical story.
Identifying Clinically Significant Findings
Beyond the numbers, a ROM test can uncover patterns that point toward specific pathologies.
Classic findings to watch for include:
- Significant Limitations: When a joint falls far short of its expected range, especially compared to the contralateral side, it may suggest conditions like capsular adhesions (e.g., adhesive capsulitis), muscle contractures, or bony blocks.
- Hypermobility: An excessive range of motion can indicate ligamentous laxity or joint instability, which may be associated with conditions like Ehlers-Danlos syndrome or be present in athletes in sports requiring extreme flexibility.
- Painful Arc of Motion: Pain that appears only during a specific portion of the movement is a classic sign of impingement or localized soft tissue inflammation. A painful arc during shoulder abduction, for example, is often indicative of subacromial impingement syndrome.
A critical takeaway is that the quality of the movement is just as important as the quantity. The presence of pain, crepitus, or compensatory patterns during the test provides invaluable diagnostic clues that a simple number cannot capture.
By analyzing data within the patient’s unique context—comparing it to norms, to their contralateral side, and tracking it over time—clinicians can bridge the gap between measurement and meaning. For a more focused breakdown, you can learn more about interpreting and applying normal values for ankle range of motion in our detailed guide.
References
- Soucie JM, Wang C, Forsyth A, et al. Range of motion measurements: a reference study. Haemophilia. 2011;17(3):500-507.
- Clarkson HM. Musculoskeletal Assessment: Joint Range of Motion and Manual Muscle Strength. 3rd ed. Philadelphia, PA: Lippincott Williams & Wilkins; 2013.
How Digital Tools Are Elevating ROM Testing
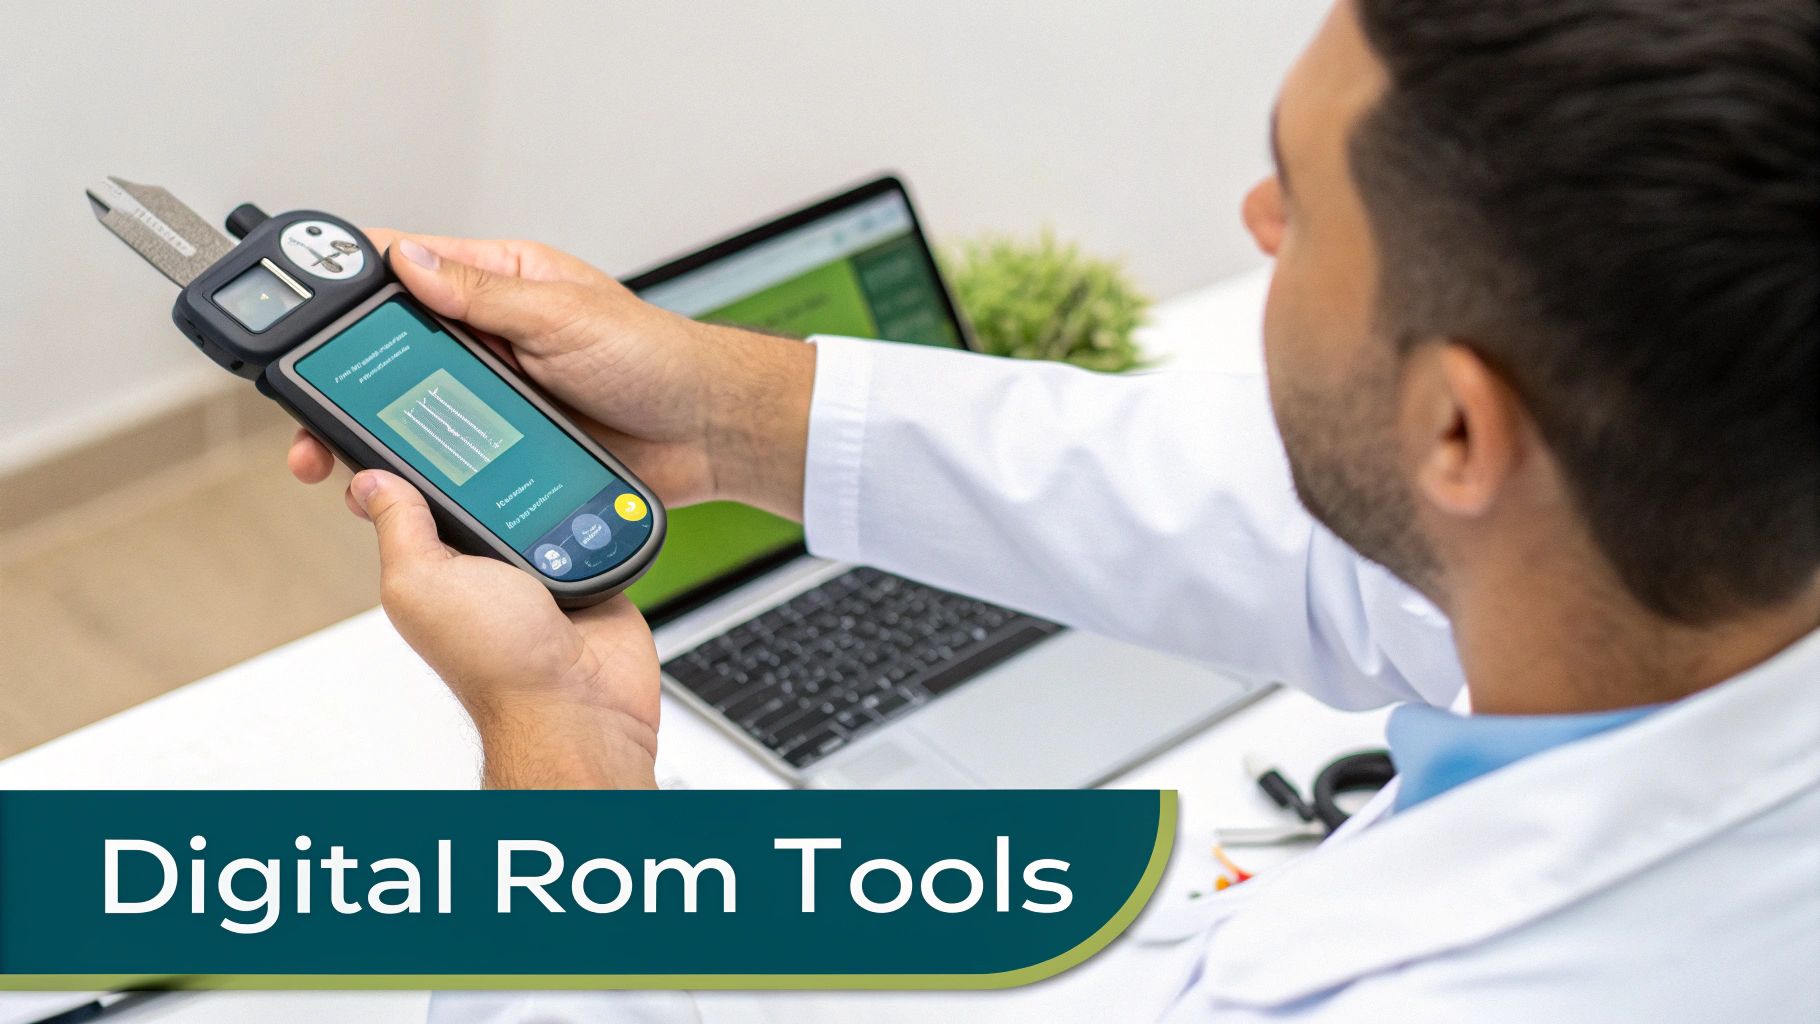
While the universal goniometer has been a clinical staple for years, technology is advancing the field. Modern digital instruments offer solutions to some of the oldest challenges in ROM assessment.
These tools bring a level of accuracy and reliability that can be difficult to achieve with manual methods. Many digital goniometers can measure within one degree of accuracy, a level of precision that helps reduce the inter-rater variability that can complicate progress tracking in a busy clinic. This ensures that a measurement taken by one clinician is directly comparable to one taken by a colleague.
Speed and Efficiency in a Clinical Setting
Consider assessing an athlete's post-operative shoulder with a traditional goniometer. The process involves juggling the tool, aligning it, stabilizing the patient, reading small tick marks, and recording the number. It is a multi-step process that requires significant focus.
Digital tools can streamline this workflow. A clinician can stabilize a patient's scapula with one hand and use a digital device in the other, receiving an instant, clear readout. This eliminates guesswork and parallax error.
The real value of digital tools is their ability to capture objective data quickly and reliably. This saves valuable session time, reduces documentation errors, and allows the clinician to focus more on the patient and less on the measurement process itself.
Ultimately, this efficiency provides more time for hands-on treatment, patient education, and other critical aspects of care.
Enhancing Patient Engagement and Progress Tracking
Many digital tools integrate with software and apps, allowing for automatic data logging and graphing over time.
This creates a clear visual representation of a patient's progress. Showing a patient a graph that tracks their journey from 95 degrees to 130 degrees of knee flexion can be incredibly motivating. It transforms an abstract number into tangible proof of their hard work, reinforcing their commitment to their recovery plan.
From the clinician's perspective, this digital documentation provides solid, objective evidence for insurance claims and medico-legal reports. For more information on how these devices function, you can explore how a digital inclinometer for physical therapy can serve as a powerful assessment tool.
Practical Advantages in Daily Use
Beyond precision, these devices offer practical benefits in the clinic.
- Ease of Use in Difficult Positions: Measuring spinal rotation or cervical lateral flexion with a standard goniometer can be awkward. Digital inclinometers simplify these complex assessments.
- Reduced Subjectivity: The tool provides a definitive number, removing the subjective interpretation required when reading a manual goniometer's scale.
- Data Portability: Storing data in an app makes it easily accessible for telehealth consultations, team collaborations, and progress reports.
By incorporating these tools into practice, clinicians can elevate their standard of care, ensuring every range of motion test is as accurate, efficient, and impactful as possible.
Avoiding the Common Pitfalls in Measurement
Even experienced clinicians can develop subtle habits that compromise data quality. A successful range of motion test requires controlling all possible variables to ensure the recorded number is an accurate reflection of the joint's isolated capacity.
Minor discrepancies can lead to flawed treatment decisions and create challenges in medico-legal contexts (1). It is crucial to troubleshoot frequent errors and reinforce best practices that lead to reliable, defensible measurements.
Addressing Compensatory Movements
The human body is adept at compensation. When a primary joint cannot perform a movement, neighboring joints are instinctively recruited. This is one of the biggest threats to measurement accuracy.
A classic example is a patient hiking their hip or tilting their pelvis to achieve what appears to be greater hip abduction. The goniometer may show an impressive number, but the measurement reflects a combination of pelvic and hip motion, not isolated hip motion.
Problem: The patient's pelvis lifts off the table during a passive hip flexion test, artificially inflating the reading.
Solution: Use your non-dominant hand to palpate and stabilize the patient’s Anterior Superior Iliac Spine (ASIS). The moment it begins to move or tilt posteriorly marks the true end of their hip flexion range. Stop the movement there and take the measurement.
Another common compensation occurs during shoulder abduction, where patients may elevate their scapula or lean their trunk. Firm stabilization of the shoulder girdle is non-negotiable for an accurate measurement.
Ensuring Correct Landmark Identification
Incorrect identification of anatomical landmarks is a frequent source of error. Placing the goniometer's fulcrum even a centimeter off the true joint axis can significantly skew the angle. This error is compounded when placement is inconsistent between sessions, making it impossible to genuinely track progress.
- Take Your Time: Rushing this step is a false economy. Always take a moment to carefully palpate and confirm bony landmarks before picking up the measurement tool.
- Mark If Necessary: For joints with less obvious landmarks or in patients with more adipose tissue, using a non-permanent skin marker can ensure you measure from the exact same spot every time.
- Stay Consistent: Develop a standardized technique for landmarking and adhere to it for every patient, every time. This is the foundation for achieving high intra-rater and inter-rater reliability.
By mastering stabilization and being meticulous with landmark identification, clinicians can eliminate the two biggest variables that corrupt data, ensuring every ROM test provides a clear, accurate, and clinically valuable insight.
References
- Rosenberg & Gluck LLP. What’s a “ROM” measurement and why is it so important?. Published December 16, 2009. Accessed October 26, 2023.
Common Questions We Hear About Range of Motion Testing
Even after mastering the basics, certain questions frequently arise in clinical practice. Here are answers to some of the most common queries from clinicians and students.
What's the Real Difference Between Active and Passive ROM?
This distinction is crucial. Active Range of Motion (AROM) is the movement a patient can achieve using their own muscles. It provides a snapshot of their functional ability and willingness to move.
Passive Range of Motion (PROM), in contrast, is the movement a clinician can achieve when the patient is completely relaxed. This reveals information about the integrity of the joint, capsule, ligaments, and other inert structures.
The gap between AROM and PROM often holds important diagnostic clues. If a patient's passive range is significantly greater than their active range, it may suggest muscle weakness, nerve involvement, or pain inhibition as the limiting factor (1).
How Often Should I Be Re-Measuring a Patient's ROM?
The frequency of re-measurement depends entirely on the clinical context.
In acute post-operative stages, ROM may be measured at every visit to monitor for rapid changes and ensure adherence to surgical protocols. For more chronic conditions or later stages of rehabilitation, re-assessing every two to four weeks is often sufficient to track meaningful change and guide program adjustments. Re-measurement is non-negotiable before progressing a rehabilitation program significantly or when making critical return-to-activity decisions.
Can I Just Use My Smartphone for Goniometry?
Smartphone applications for goniometry are widely available and can be useful for quick, informal checks or for providing patients with a rough visual of their progress.
However, for formal clinical documentation, insurance purposes, or medico-legal reports, the standard remains a dedicated, medical-grade goniometer—whether a universal manual model or a high-quality digital device. Studies on the validity and reliability of smartphone apps have shown mixed results, with accuracy often depending on the application, the phone model, and the joint being measured (2). Validated medical tools provide the reliable, defensible results necessary to demonstrate impairment and justify care.
References
- Clarkson HM. Musculoskeletal Assessment: Joint Range of Motion and Manual Muscle Strength. 3rd ed. Philadelphia, PA: Lippincott Williams & Wilkins; 2013.
- Keogh A, Kírova S, Crighton A, et al. The validity and reliability of the universal goniometer and a novel smartphone application, DrGoniometer, for the measurement of the knee range of motion. Knee. 2017;24(6):1413-1422.
Ready to swap subjective guesswork for objective, reliable data? The Meloq ecosystem of portable digital measurement tools gives you the accuracy and efficiency your practice needs. See how our digital goniometers, dynamometers, and force plates can elevate your clinical assessments.

Featured Product
EasyAngle Digital Goniometer
Measure range of motion with clinical precision. CE certified, Bluetooth connected.
Learn More