
How to Use a Goniometer for Accurate ROM Assessment
Team Meloq
Author
At its core, using a goniometer is about aligning its central point—the fulcrum—with the joint's axis of rotation. One arm remains stationary along a fixed body part, while the other arm moves to follow the joint's path. This simple process transforms subjective observations into objective, quantifiable data, which is the foundation of accurate diagnosis and tracking patient progress.
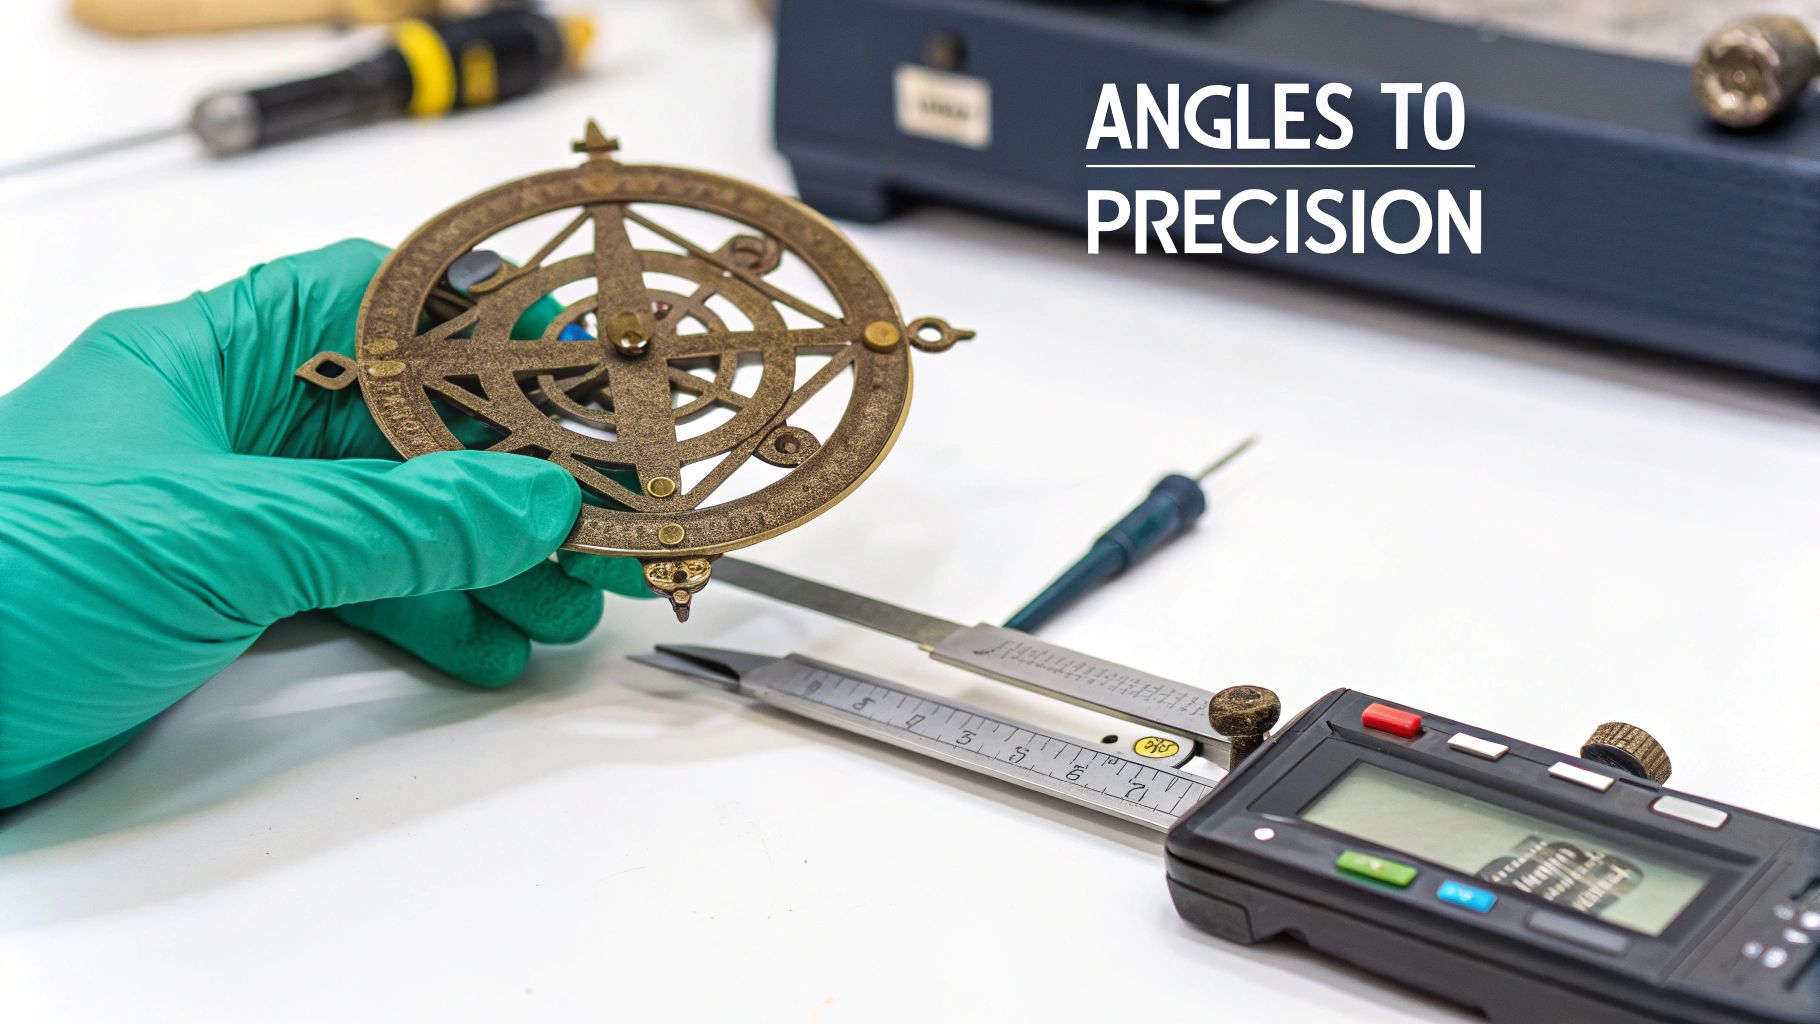
From Celestial Angles to Clinical Precision
The goniometer is far more than a simple protractor. For clinicians, mastering it is a fundamental skill, representing the shift from subjective assessment to evidence-based practice. It delivers the concrete data needed to build effective treatment plans, demonstrate outcomes, and clearly communicate progress to patients and other stakeholders.
It's fascinating to consider that this tool's origins can be traced to 1538. It was then that Dutch physician and mathematician Gemma Frisius first described an instrument based on the astrolabe for measuring angles—a precursor to the goniometers we use for joint angle measurements in clinical settings today.
The Power of Quantifiable Data in Patient Care
In physiotherapy and sports rehabilitation, objective measurements are essential. Without them, assessments remain subjective, and progress can be difficult to prove. The goniometer bridges this gap by providing a standardized method to quantify a joint's range of motion (ROM). A single number can offer powerful insights.
- Establishes a Clear Baseline: Following an injury or surgery, the initial measurement becomes the benchmark against which all future progress is measured.
- Guides Treatment Planning: A specific reading, like 90° of knee flexion, helps clinicians set realistic, incremental goals for recovery.
- Validates Therapeutic Interventions: Observing a patient's shoulder abduction improve from 120° to 150° provides undeniable evidence that a treatment protocol is effective.
For a clinician, the goniometer serves as a universal language for movement. It allows professionals to communicate a patient's status with precision, removing the ambiguity of terms like "stiff" or "limited."
Evolving from Manual to Digital Precision
While the principles of goniometry remain unchanged, the tools have evolved. Traditional plastic goniometers present challenges; they often require two hands and careful visual alignment, which can introduce variability between measurements (1). You can get a deeper dive into what a goniometer is used for in our detailed guide.
This is where modern digital goniometers can offer significant advantages. Many allow for one-handed operation, freeing the clinician’s other hand to properly stabilize the patient—a critical factor for accuracy. With a clear digital readout, these tools eliminate the parallax error common with manual readings and can provide measurements accurate to within 1°.
This technological leap empowers clinicians to capture more reliable data, enhancing the quality of care and connecting a rich history of measurement to the demands of modern practice.
References
- Gajdosik RL, Bohannon RW. Clinical measurement of range of motion. Review of goniometry emphasizing reliability and validity. Phys Ther. 1987 Dec;67(12):1867-72.
Foundations for a Flawless Measurement
Reliable data collection begins long before a goniometer is placed on a patient. Preparation is just as critical as the measurement itself. A trustworthy reading is built on a foundation of clear communication, patient comfort, and consistent positioning.
First, talk to your patient. Simply stating you're going to "measure their joint" is insufficient. Take a moment to explain the procedure, its importance for their recovery, and what they can expect to feel. This simple step helps build rapport and encourages relaxation.
When a patient is comfortable and informed, they are less likely to exhibit muscle guarding—an involuntary tensing around an injury. Guarding can restrict movement and lead to an inaccurate, limited reading. The goal is to assess the joint's true capacity, not its protective reflex.
Choosing the Right Tool for the Job
While it may seem obvious, the size of the goniometer is crucial. Using a large goniometer on a small finger joint makes it nearly impossible to align the arms with the bony landmarks. Conversely, using a small goniometer on a large joint like the hip or knee means the arms are too short to accurately align with landmarks such as the femur and tibia.
- For large joints (hip, knee, shoulder): A large goniometer, often with 12-inch or longer arms, is needed to properly align with distant anatomical landmarks.
- For smaller joints (elbow, ankle, wrist): A standard medium-sized goniometer is typically suitable and easier to handle.
- For very small joints (fingers, toes): A specialized finger goniometer is essential for obtaining an accurate measurement.
Selecting the right instrument is the first mechanical step toward getting a number you can trust. If you're curious about what's out there beyond traditional goniometers, you can explore some modern range of motion measurement tools in our detailed overview.
The Art of Patient Positioning and Stabilization
The cornerstone of a reliable measurement is patient positioning. The objective is to isolate the joint being measured and prevent compensatory movements from skewing the results. Without proper stabilization, the body will naturally "cheat" to achieve more movement, rendering the measurement invalid.
Consider measuring hip flexion. If the patient is lying on their back and their pelvis is not stabilized, they can achieve extra "flexion" by tilting their pelvis posteriorly or flexing their lumbar spine. The number on the goniometer may appear impressive, but it would be an artificially high reading.
Proper stabilization isn't just a suggestion; it's a non-negotiable principle of goniometry. A measurement taken on an unstable patient is, at best, a rough estimate and, at worst, clinically misleading.
To prevent this compensation, the patient would lie supine with the opposite leg straight to help stabilize the pelvis. A clinician might use their free hand to provide gentle counter-pressure on the anterior superior iliac spine (ASIS) to ensure it doesn't move as the hip is guided into flexion. This meticulous setup ensures the recorded number reflects true hip joint motion.
The same principle applies to every joint. When measuring knee extension, it's crucial to ensure the hip does not lift off the table. A small towel roll under the distal femur can help standardize the position and isolate the knee movement. Mastering these ideal setups for each joint is fundamental to obtaining measurements that are clinically sound.
Mastering Goniometry for Major Joints
With the foundational principles understood, it's time to apply them. Becoming proficient with a goniometer across different joints is what distinguishes a novice from an experienced practitioner. The key is not to memorize angles but to develop a repeatable, systematic approach for each part of the body. This involves consistently identifying landmarks, stabilizing the patient, and maintaining proper alignment every time.
This is a hands-on skill. It’s less about the numbers themselves and more about a deep understanding of the unique anatomy and biomechanics of each joint. Let's walk through the practical steps for the major joints you'll be measuring in daily practice, from the shoulder complex down to the ankle.
This visual guide is a great reminder of the essential prep steps to take before every single measurement. It’s all about making sure your technique is solid from the get-go.
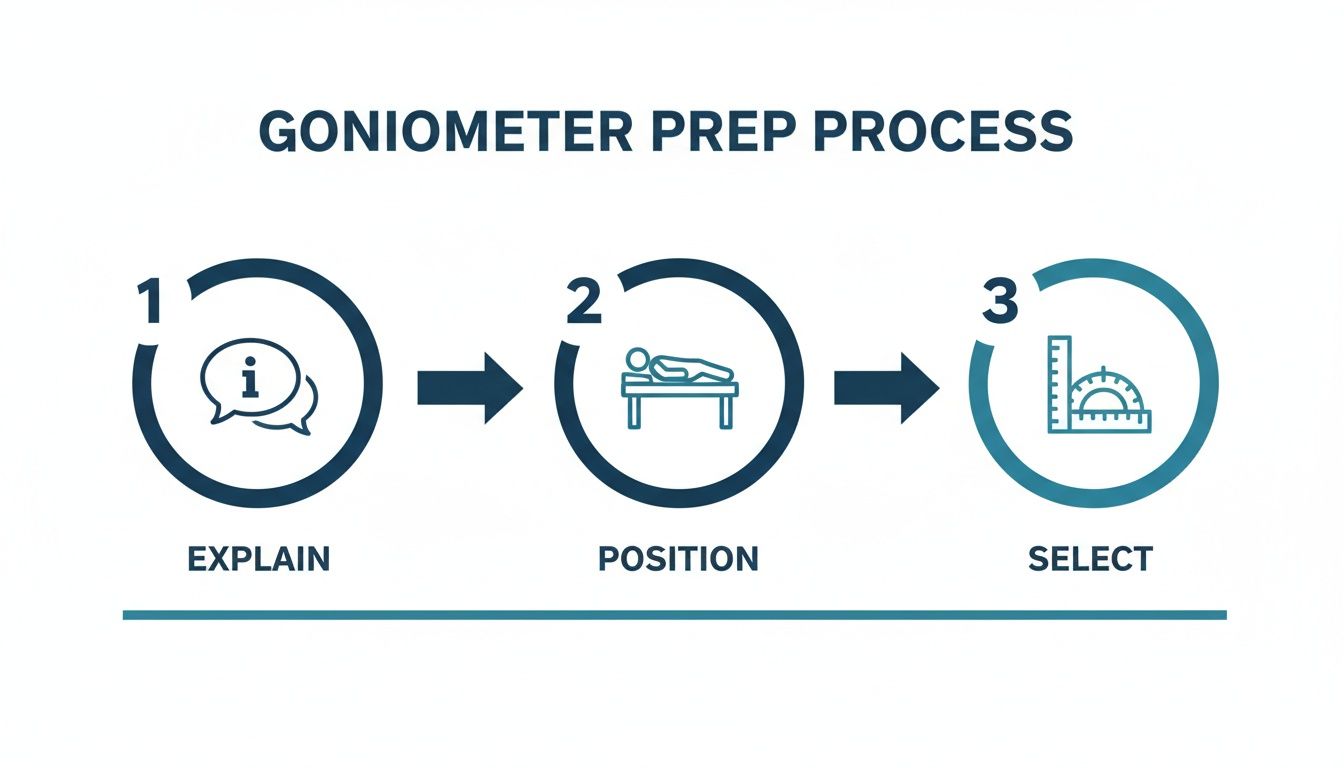
Adhering to a simple workflow—Explain, Position, Select—helps standardize your approach and control for variables that can compromise your readings.
The Shoulder Complex: A Deep Dive
The shoulder, or glenohumeral joint, is known for its extensive mobility. This same characteristic also makes it challenging to measure accurately. The body is adept at compensation, and scapular or spinal movements can easily "cheat" the measurement if not properly controlled.
For shoulder flexion (lifting the arm forward), position the patient lying supine with their arm in a neutral position. This helps stabilize the ribcage and thoracic spine, preventing them from contributing to the motion.
- Fulcrum: Placed on the lateral aspect of the greater tubercle. This is the bony point on the outside of the upper arm, just below the acromion.
- Stationary Arm: Kept parallel to the mid-axillary line of the trunk.
- Movable Arm: This arm follows the humerus, pointing toward the lateral epicondyle of the elbow.
As you guide the arm into flexion, carefully observe the patient's back. Any arching is a clear sign of compensation and should be corrected to obtain a true glenohumeral measurement. Having a baseline in mind helps; you can find more on typical shoulder range of motion norms in our detailed article.
Measuring the Elbow and Wrist
The elbow is a simpler hinge joint, but this does not diminish the need for precision. To measure elbow flexion, the patient can be positioned supine with their upper arm supported on the table. This is crucial for preventing unwanted shoulder movement.
The key landmark is the lateral epicondyle of the humerus—the prominent bony bump on the outer elbow.
- Fulcrum: Placed directly over the lateral epicondyle.
- Stationary Arm: Aligned with the midline of the humerus, pointing toward the acromion.
- Movable Arm: Aligned with the radius bone in the forearm, pointing towards the styloid process on the thumb side of the wrist.
A common error is allowing the patient to lift their shoulder off the table. A gentle stabilizing hand on their upper arm can prevent this and ensure an isolated measurement.
For the wrist, the patient should be seated with their forearm resting on a table, hand just off the edge. This position minimizes the influence of forearm muscles. The fulcrum is placed over the triquetrum, a small carpal bone on the ulnar (pinky) side of the wrist.
Tackling the Lower Body: The Hip and Knee
When measuring the lower body, stabilization is the primary challenge. The pelvis and lumbar spine often contribute to movement, and diligent control is necessary to prevent this.
For hip flexion, the patient lies supine. As with the shoulder, compensation must be monitored. A useful clinical technique is to keep one hand on their Anterior Superior Iliac Spine (ASIS) to detect any posterior pelvic tilt as the hip flexes.
- Fulcrum: Aligned with the greater trochanter of the femur (the large bony prominence on the side of the hip).
- Stationary Arm: Aligned with the midline of the pelvis.
- Movable Arm: Follows the lateral midline of the femur, pointing toward the knee's lateral epicondyle.
For knee flexion, the patient can be positioned prone or supine. The prone position often makes it easier to isolate the hamstrings.
The most reliable goniometric data comes from a relaxed, well-supported patient. Any tension, discomfort, or need for the patient to self-stabilize will introduce confounding variables and compromise the measurement's validity.
The fulcrum is placed on the same landmark used for the hip's movable arm: the lateral epicondyle of the femur.
- Fulcrum: Directly over the lateral epicondyle.
- Stationary Arm: Aligned with the greater trochanter of the hip.
- Movable Arm: Follows the fibula, pointing towards the lateral malleolus at the ankle.
During any knee measurement, ensure the hip does not lift off the table, as this is a common compensatory movement that will artificially inflate the reading.
Perfecting Ankle Measurements
Ankle dorsiflexion and plantar flexion are crucial for everything from gait analysis to functional movement assessments. The most significant error here is allowing the foot to invert or evert. This must be stabilized against.
Position the patient sitting with their knee bent to 90 degrees, with their foot flat on the floor or a stool. This position places the gastrocnemius muscle on slack, which can otherwise limit true ankle dorsiflexion.
- Fulcrum: Positioned directly over the lateral malleolus.
- Stationary Arm: Aligned with the midline of the fibula, pointing toward the fibular head.
- Movable Arm: Kept parallel to the fifth metatarsal (the long bone on the outside of the foot).
As the patient dorsiflexes, ensure their heel remains down and the foot does not roll inward or outward. This isolates the talocrural joint and provides a pure, accurate number.
Here's a quick cheat sheet to keep these alignments straight.
Quick Reference Guide for Goniometer Alignment
| Joint & Motion | Fulcrum Placement | Stationary Arm Alignment | Movable Arm Alignment |
|---|---|---|---|
| Shoulder Flexion | Lateral aspect of the greater tubercle | Parallel to the mid-axillary line of the trunk | Midline of the humerus, toward the lateral epicondyle |
| Elbow Flexion | Lateral epicondyle of the humerus | Midline of the humerus, toward the acromion | Midline of the radius, toward the styloid process |
| Hip Flexion | Greater trochanter of the femur | Midline of the pelvis | Lateral midline of the femur, toward the lateral epicondyle |
| Knee Flexion | Lateral epicondyle of the femur | Lateral midline of the femur, toward the greater trochanter | Midline of the fibula, toward the lateral malleolus |
| Ankle Dorsiflexion | Over the lateral malleolus | Midline of the fibula, toward the fibular head | Parallel to the fifth metatarsal |
A solid grasp of these placements is fundamental to obtaining measurements you can actually trust.
Active vs. Passive Range of Motion
For every joint, it is critical to measure both Active Range of Motion (AROM) and Passive Range of Motion (PROM), as they provide different clinical information.
- Measure AROM first. This is the range of motion the patient can achieve on their own. It offers insight into their functional ability, muscle strength, and willingness to move through potential pain.
- Then, assess PROM. This is the range of motion you can achieve when moving the joint for them. It reveals the joint's true mechanical mobility—the integrity of the joint capsule, ligaments, and articulating surfaces.
A significant difference between AROM and PROM often suggests muscle weakness or pain inhibition rather than a true joint restriction (1). For example, if a patient actively flexes their shoulder to only 90 degrees, but you can passively move them to 150 degrees, the limitation is likely related to factors like rotator cuff function rather than a stiff joint capsule.
Once these techniques are mastered, they can be applied to complex clinical scenarios, such as in understanding frozen shoulder treatment, where tracking ROM is paramount. This objective data becomes the bedrock of your clinical reasoning and guides the entire plan of care.
References
- Gajdosik RL, Bohannon RW. Clinical measurement of range of motion. Review of goniometry emphasizing reliability and validity. Phys Ther. 1987 Dec;67(12):1867-72.
Improving Your Reliability and Avoiding Common Errors
Obtaining an accurate reading is a good start, but the true mark of clinical skill is consistency. Reliable, repeatable measurements are what transform good data into a powerful tool for tracking patient outcomes over time. This requires a focus on both intra-rater reliability (an individual clinician's consistency) and inter-rater reliability (consistency between different clinicians).
Mastering reliability means actively avoiding the common pitfalls that can compromise your results. Even experienced clinicians can make small errors that, over time, can create a misleading clinical picture. Let's examine these errors to help you refine your technique and minimize measurement variability.
The Most Common Measurement Pitfalls
Several subtle errors can frequently appear in goniometry practice. Awareness is the first step toward eliminating them from your workflow.
- Misidentifying Bony Landmarks: This is arguably the most frequent mistake. If the fulcrum is not perfectly aligned with the joint's axis of rotation, the entire measurement is compromised from the outset.
- Failing to Stabilize: Without adequate stabilization, the body will compensate by recruiting nearby joints. Measuring shoulder flexion without stabilizing the scapula and trunk will yield an inflated reading that does not reflect true glenohumeral motion.
- Inconsistent Force (PROM): When measuring passive range of motion, the amount of overpressure applied is critical. Applying different amounts of force on different days will produce varying results, making it impossible to determine if the joint itself has actually changed.
- Parallax Error: This is a classic error associated with manual goniometers. It occurs when reading the scale from an angle rather than directly above it, which can easily alter the perceived reading by several degrees.
Actionable Advice for Better Consistency
Improving reliability comes down to standardization and meticulous technique. It involves building a systematic process that you follow for every patient, every time.
A goniometric measurement is only as trustworthy as the process used to obtain it. Inconsistent technique produces inconsistent data, which can misguide treatment decisions and inaccurately reflect a patient's progress.
Here’s a practical breakdown of how to address these common issues with a simple 'do this, not that' approach.
Do This:
- Always palpate and consider marking your bony landmarks with a skin-safe pen before placing the goniometer.
- Use your free hand or supportive tools like pillows and wedges to firmly stabilize the proximal segment of the joint.
- Establish a consistent end-feel pressure for your PROM tests—for instance, moving the joint only until the first point of firm resistance is felt.
- Always position your eyes directly above the goniometer scale for a true, perpendicular view to get an accurate reading.
Not That:
- Never guess the location of a landmark or place the goniometer based on a quick visual check.
- Don't allow the patient to hold their own position, as they will almost certainly compensate.
- Avoid applying variable force during passive measurements.
- Don't read the goniometer from a comfortable seated position if it means viewing the scale at an angle.
How Digital Tools Solve Reliability Challenges
This is an area where modern digital tools can provide significant benefits. While clinician skill and practice are always essential, a high-quality digital goniometer can inherently address many common sources of human error, leading to improved reliability (1).
Take parallax error, for example. A device with a clear digital display completely eliminates it. The number is presented objectively, regardless of the viewing angle. This feature alone removes a major source of variability.
Furthermore, many digital goniometers are designed for one-handed operation. This frees up the other hand to focus entirely on stabilizing the patient. Better stabilization leads directly to more valid and reliable measurements, ensuring the collected data is a true reflection of the isolated joint's capacity. Research has indicated that digital instruments can achieve higher reliability scores compared to traditional goniometers, making them a valuable asset for any practice focused on data-driven care (2).
Ultimately, whether using a traditional or digital tool, the goal is the same: to produce clean, consistent, and defensible data that supports clinical decisions and accurately charts a patient's journey back to health.
References
- Gajdosik RL, Bohannon RW. Clinical measurement of range of motion. Review of goniometry emphasizing reliability and validity. Phys Ther. 1987 Dec;67(12):1867-72.
- Williams B, Bartlett M, Raja A, Methvan J, Keenan A. Validity, Reliability, and Efficiency of a Standard Goniometer, Medical Inclinometer, and Builder’s Inclinometer for Measuring Ankle Dorsiflexion. Int J Sports Phys Ther. 2023 Aug 1;18(4):947-954.
Documenting and Interpreting Your Measurements

Obtaining a precise goniometer measurement is only part of the task. The data is of little value if it is not recorded correctly and integrated into clinical reasoning. Clear, standardized documentation transforms a simple number into a critical piece of the patient’s clinical story, allowing for progress tracking, treatment justification, and effective communication with other healthcare providers.
Every measurement must be documented consistently. Without a clear format, clinical notes can become a confusing collection of numbers that are difficult to interpret later.
The Anatomy of a Perfect Note
For every range of motion assessment, clinical notes should capture several key pieces of information.
- Date: Essential for tracking changes over time.
- Joint and Motion: Be specific, e.g., "Right Shoulder External Rotation," not just "shoulder."
- Type of Motion: Specify whether it was AROM (Active Range of Motion) or PROM (Passive Range of Motion).
- The Exact Range: Always record both the start and end positions, such as 0-135°. For a joint with hyperextension, this might be documented as 10-0-135°.
- Qualitative Notes: Numbers do not tell the whole story. Note the end-feel (e.g., firm, hard, empty) and any patient reports, such as pain, clicking, or apprehension during the movement.
A complete entry might look like this: "Left Knee Flexion AROM: 20-95°, pain reported at end range; PROM: 10-110°, firm capsular end-feel." This single line provides a rich, multi-faceted clinical picture.
A measurement is a data point; a well-documented measurement is a clinical insight. It transforms raw numbers into a narrative of progress, limitation, and recovery that guides your every decision.
From Numbers to Narrative
The real skill lies in interpreting these findings. It involves more than just comparing numbers to normative data. A large discrepancy between a patient's active and passive range, for instance, rarely indicates simple joint stiffness. More often, it suggests factors such as underlying muscle weakness, neuromuscular inhibition, or guarding due to pain (1).
This is where the numbers begin to tell a story. Is the limitation due to a tight joint capsule, a weak muscle, or a protective response? Documented end-feel and patient reports help differentiate these causes, which directly shapes the treatment plan. You can find more practical guidance on how to document range of motion effectively in our detailed article.
Technology can provide a significant advantage here. Companion apps for digital goniometers can automatically log data with timestamps, reducing manual entry errors. They can also instantly graph progress, creating visual reports that are powerful for both clinical analysis and for showing patients their improvement. A trend line illustrating their shoulder flexion improving week by week can be highly motivating for a patient and provides solid evidence to support your interventions.
References
- Gajdosik RL, Bohannon RW. Clinical measurement of range of motion. Review of goniometry emphasizing reliability and validity. Phys Ther. 1987 Dec;67(12):1867-72.
Your Top Goniometry Questions, Answered
Even after mastering the basics, certain questions often arise in clinical practice. Clarifying these common points can refine your technique and ensure your data is robust.
Here are answers to some of the most frequently asked questions from clinicians and students.
What's the Real Difference Between AROM and PROM?
Think of it this way: Active Range of Motion (AROM) is what your patient can achieve on their own, using their own muscles. It reflects their functional ability and provides insight into their willingness to move and any associated pain.
Passive Range of Motion (PROM), on the other hand, is how far you, the clinician, can move their joint for them. This isolates the inert structures of the joint—the capsule and ligaments—from the muscles. When there's a large discrepancy between AROM and PROM, it's a significant clue that the limitation may be due to muscle weakness or pain inhibition, rather than a stiff joint (1).
How Can I Make Sure My Measurements Are Consistent?
Consistency—or intra-rater reliability—is achieved by creating a standardized process and adhering to it every time.
This means using the exact same patient position and stabilization for a given joint. Palpating and marking bony landmarks before picking up the goniometer is a crucial step. For passive tests, applying the same gentle but firm pressure is also critical. Ultimately, there is no substitute for deliberate and consistent practice.
A high-quality digital goniometer can also be a valuable tool in this regard, removing the guesswork from reading the scale and providing a clean, objective number every time.
A goniometric measurement is only as trustworthy as the process used to obtain it. Inconsistent technique produces inconsistent data, which can misguide treatment decisions and inaccurately reflect a patient's progress.
Are Digital Goniometers Actually Better Than Plastic Ones?
When it comes to reliability, evidence suggests that high-quality digital goniometers have significant advantages. Research has shown they can reduce variability not just for a single clinician but also between different clinicians (inter-rater reliability).
Why? They completely eliminate parallax error—the classic mistake of misreading a manual scale from an angle. Instead, you get a precise digital readout (2).
For many, a key benefit is single-handed operation. This frees up the other hand to focus entirely on stabilizing the patient, which is one of the most critical components of obtaining a clean, valid measurement.
Can You Really Measure Spinal Motion with a Goniometer?
Attempting to measure spinal motion with a standard plastic goniometer is often unreliable. The spine is a complex, multi-segmental structure that does not move on a simple hinge like an elbow or knee.
This is an area where a digital goniometer with a built-in inclinometer function can be particularly useful.
For example, to obtain a more reliable lumbar flexion measurement, a digital device can be placed on two landmarks (such as T12 and S1), zeroed, and then used to measure the true angular change between those two points as the patient bends forward. This provides a more accurate and repeatable assessment of segmental spinal motion.
References
- Gajdosik RL, Bohannon RW. Clinical measurement of range of motion. Review of goniometry emphasizing reliability and validity. Phys Ther. 1987 Dec;67(12):1867-72.
- Williams B, Bartlett M, Raja A, Methvan J, Keenan A. Validity, Reliability, and Efficiency of a Standard Goniometer, Medical Inclinometer, and Builder’s Inclinometer for Measuring Ankle Dorsiflexion. Int J Sports Phys Ther. 2023 Aug 1;18(4):947-954.
At Meloq, our focus is on giving clinicians the tools they need for precise, data-driven practice. The Meloq EasyAngle digital goniometer is built to boost your accuracy and efficiency, helping you turn subjective observations into objective data you can build a treatment plan on.

Featured Product
EasyAngle Digital Goniometer
Measure range of motion with clinical precision. CE certified, Bluetooth connected.
Learn More