
How to Measure Ankle Dorsiflexion: An Evidence-Based Guide
Team Meloq
Author
Measuring ankle dorsiflexion involves assessing the angle between the foot and the shin as the toes move toward the shin. This is typically accomplished using a goniometer or inclinometer in one of two primary positions: a weight-bearing lunge position for a functional assessment, or a non-weight-bearing position (e.g., supine) to evaluate the joint's passive range. Regardless of the method chosen, adherence to a standardized protocol is essential for obtaining reliable and clinically meaningful results.
Why Accurate Ankle Dorsiflexion Measurement is Crucial
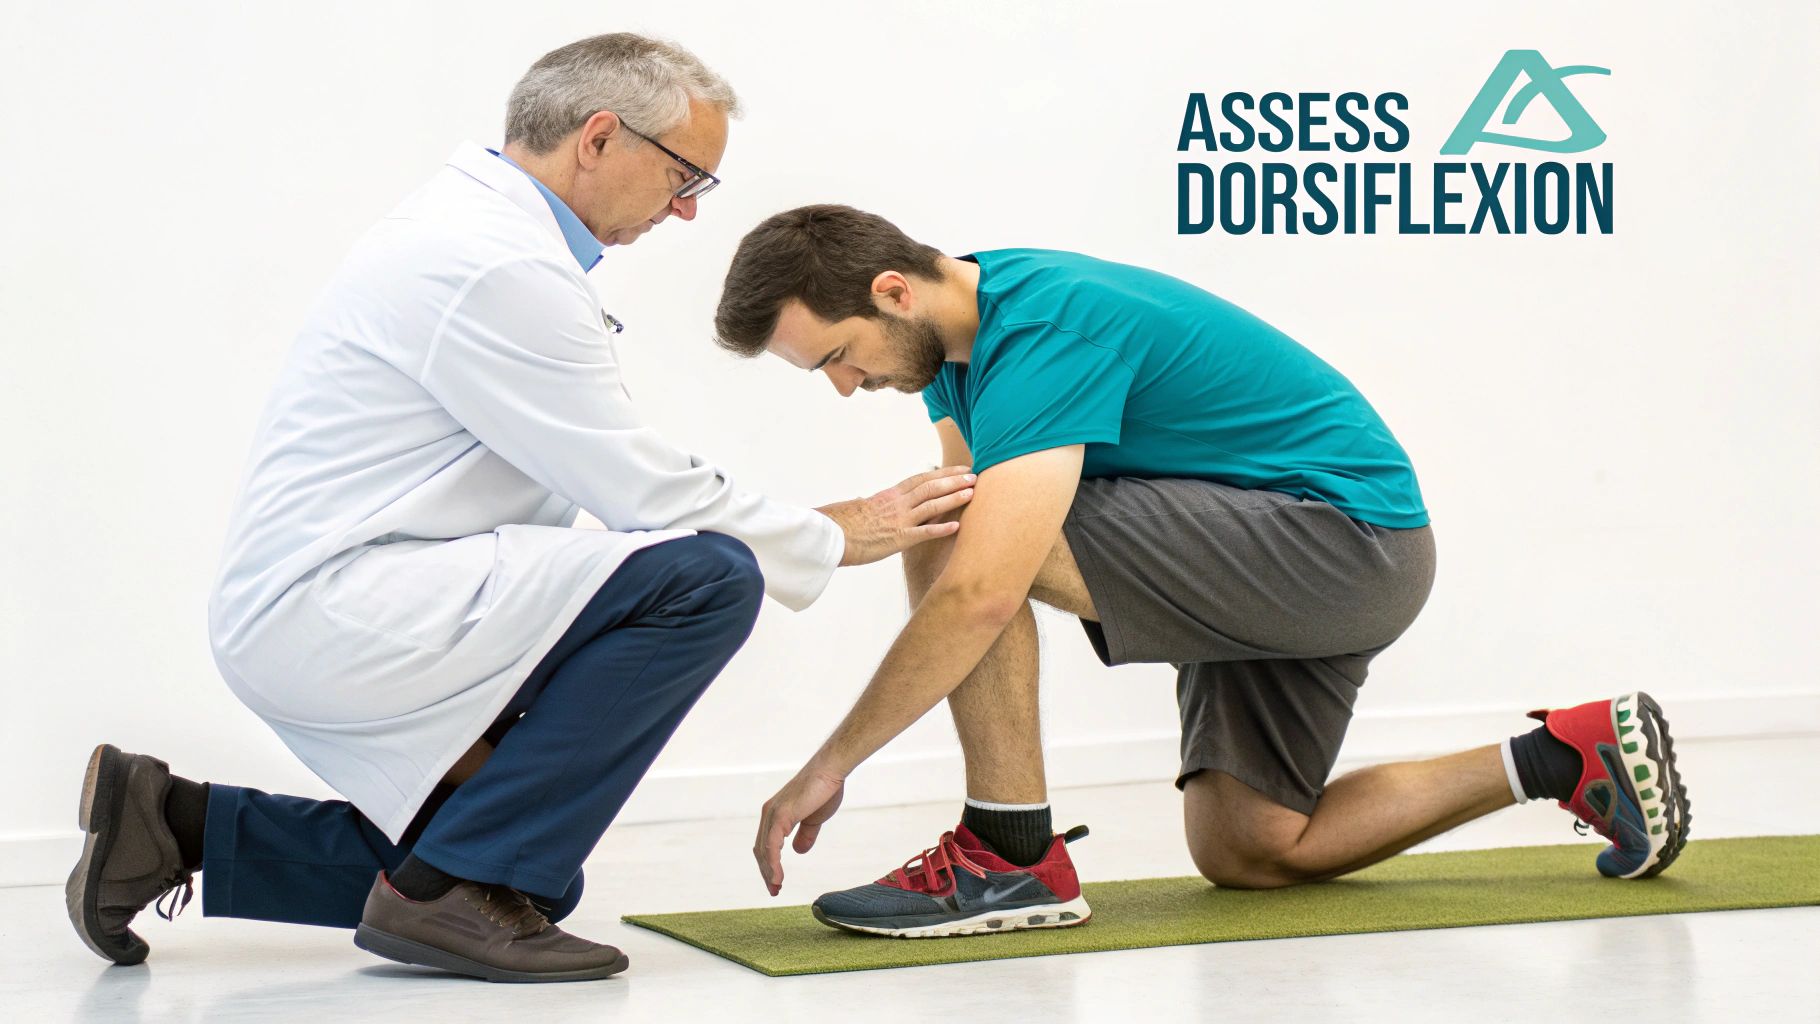
Knowing how to properly measure ankle dorsiflexion is a foundational clinical skill. This single measurement provides a critical window into the health of the talocrural joint. When this joint's mobility is restricted, the body must compensate by seeking mobility elsewhere, often triggering a cascade of biomechanical changes up the kinetic chain.
The Kinetic Chain Domino Effect
The human body functions as an integrated kinetic chain. If one link—in this case, the ankle—has limited mobility, forces are redistributed to adjacent joints that may not be designed to handle the additional stress. Consequently, a restriction in ankle dorsiflexion rarely remains an isolated ankle problem.
Consider a deep squat. Limited ankle dorsiflexion is a well-documented contributor to several movement faults:
- Knee Valgus: The knees may collapse inward, increasing strain on structures like the anterior cruciate ligament (ACL) (1).
- Lower Back Strain: To maintain balance and prevent falling backward, the torso may pitch forward excessively, increasing lumbar spine loading.
- Heel Lift: The heels often lift from the ground, which fundamentally destabilizes the base of support for the movement.
These compensations are not merely indicators of poor technique; they represent biomechanical pathways that can increase the risk of injury. By accurately measuring dorsiflexion, clinicians can identify the root cause of these movement dysfunctions before they contribute to chronic conditions.
A restricted ankle can contribute to dynamic knee valgus during a squat, which can impair force production and elevate injury risk. Similarly, upon landing from a jump, an immobile ankle may fail to adequately attenuate ground reaction forces, transmitting excessive shock to the knee and hip.
The Importance of Standardized and Reliable Methods
To make sound clinical decisions, measurements must be both consistent and repeatable. This is why standardized testing protocols are non-negotiable in clinical practice. The two primary methods for assessment are weight-bearing and non-weight-bearing.
Weight-bearing tests, such as the lunge test, reveal functional range of motion under load, simulating activities like running or squatting. Conversely, non-weight-bearing tests isolate the joint's passive range of motion, helping to identify specific tissue restrictions without the influence of body weight or neuromuscular control.
High reliability is achievable with proper technique. Research has established standardized methods for measuring passive ankle dorsiflexion that demonstrate excellent interrater reliability. One study reported an Intraclass Correlation Coefficient (ICC) of 0.97, indicating almost perfect agreement between different assessors using the same protocol (2).
Mastering a standardized approach is fundamental for tracking patient progress and demonstrating the efficacy of interventions. Objective data validates treatment effectiveness and provides the necessary evidence for clinical documentation. Furthermore, a thorough dorsiflexion assessment provides valuable insight into key factors in preventing shin splints, a common ailment among runners.
Choosing Your Method: Weight-Bearing vs. Non-Weight-Bearing
When measuring ankle dorsiflexion, the primary clinical question is: "Am I assessing functional capacity or identifying the source of a joint restriction?" The answer determines whether to assess the ankle under load or in a passive, isolated state on the examination table. Both the weight-bearing and non-weight-bearing approaches provide valuable, yet distinct, information.
The Gold Standard for Functional Assessment
For evaluating how the ankle performs during dynamic activities like squatting, lunging, or landing, the Weight-Bearing Lunge Test (WBLT) is considered the gold standard. This method assesses the ankle in a closed kinetic chain (foot fixed), providing a clear picture of an individual's usable, functional range of motion.
The clinical utility of the WBLT lies in its direct relevance to performance and daily activities. It reveals the amount of dorsiflexion an individual can actively access when it matters. If an athlete presents with faulty squat mechanics, this test can quickly help determine if an ankle mobility deficit is a contributing factor.
It is important to note that minor variations in test setup can influence the results. For example, research comparing standing versus kneeling versions of the WBLT found that the standing lunge test yielded significantly greater distance measurements (mean 12.5 cm) compared to the kneeling version (mean 10.9 cm) (3). This highlights the critical need for a consistent setup to ensure reliable measurements across sessions. You can dive deeper into these comparative findings to better understand their clinical implications.
Isolating the Joint with Non-Weight-Bearing Techniques
While the WBLT is excellent for assessing function, non-weight-bearing methods are superior for diagnostic precision. By positioning the patient in supine or prone, the influences of body weight and muscular compensation are removed. This allows for the assessment of the true passive range of the talocrural joint.
This approach is ideal for pinpointing the source of a restriction. Is it due to gastrocnemius tightness, soleus stiffness, or a restriction within the joint capsule itself? By testing with the knee extended versus flexed, a clinician can differentiate between these structures to guide more targeted and effective treatment.
Non-weight-bearing tests facilitate a diagnostic deep dive. They help answer why the ankle is restricted, whereas weight-bearing tests show how that restriction impacts functional movement.
Consider a patient recovering from an ankle sprain who may have stiffness from scar tissue or capsular adhesions. A non-weight-bearing assessment allows the clinician to gently move the joint to its passive end-range, identifying the limiting structures without provoking the protective muscle guarding that often occurs in a weight-bearing position.
Ultimately, the choice of method depends on the clinical objective. A simple comparison can help guide this decision.
Comparison of Dorsiflexion Measurement Methods
The table below provides a side-by-side comparison of weight-bearing and non-weight-bearing techniques, serving as a quick reference for selecting the most appropriate method.
| Feature | Weight-Bearing Method (e.g., WBLT) | Non-Weight-Bearing Method (e.g., Supine Goniometry) |
|---|---|---|
| Primary Goal | Assess functional, active range of motion under load. | Isolate passive joint mobility and identify specific tissue restrictions. |
| Best For | Evaluating movement patterns like squats, lunges, and jumping. | Diagnosing the root cause of stiffness (e.g., muscle vs. joint capsule). |
| Real-World Context | High relevance for sports performance and daily activities. | Ideal for post-injury assessment or when a patient cannot bear weight. |
| Potential Limitation | Can be influenced by balance, strength, and whole-body compensation. | May not reflect the available range during dynamic, functional tasks. |
In many cases, a comprehensive ankle assessment will utilize both approaches. A non-weight-bearing test can help identify the underlying limitation, while a subsequent weight-bearing test can demonstrate how that limitation manifests functionally.
Mastering the Weight-Bearing Lunge Test Protocol
To understand how an ankle performs under real-world loads, the Weight-Bearing Lunge Test (WBLT) is an indispensable tool. This test measures the ankle's true functional mobility, and mastering the protocol is essential for any clinician seeking reliable data to guide treatment and track meaningful progress. The WBLT's value lies in its simplicity and direct correlation to everyday movement, as it pushes the talocrural joint into dorsiflexion while the foot is planted, closely mimicking the demands of a squat or the loading phase of gait.
Setting Up for Success
A precise and consistent setup is paramount for a reliable WBLT. The objective is to isolate ankle motion and prevent compensatory movements that could artificially inflate the measurement.
The individual should stand barefoot facing a wall. The test foot is positioned with the great toe pointing directly toward the wall. The contralateral leg is placed behind in a split stance to maintain balance.
The instruction is to lunge forward and attempt to touch the knee to the wall while keeping the heel of the front foot firmly on the floor. The moment the heel begins to lift, the test is stopped, as this indicates the onset of compensation.
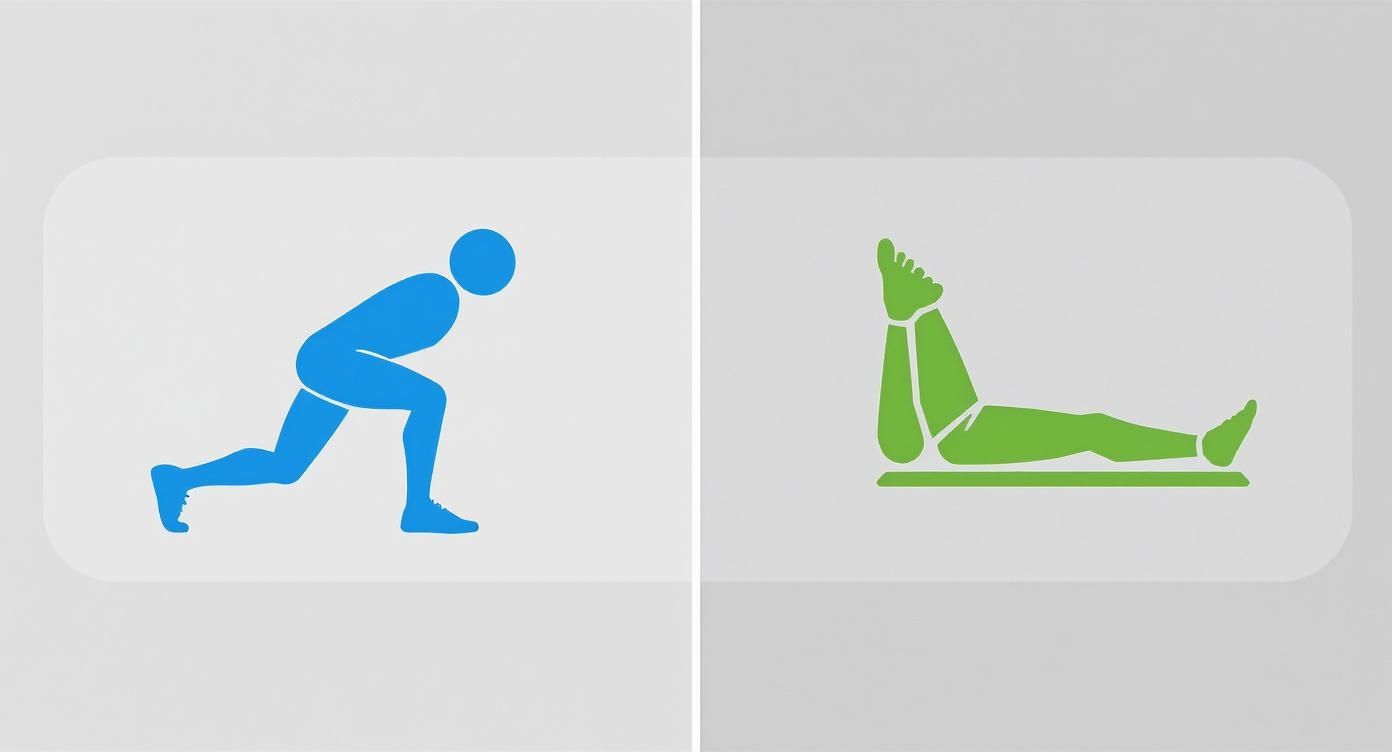
This graphic illustrates the fundamental difference between assessing the ankle under load versus in a relaxed, non-loaded state.
Taking the Measurement: Two Reliable Ways
Once the setup is standardized, there are two primary methods for quantifying the result. Both are well-validated, but consistency in the chosen method is key for follow-up assessments.
1. Wall-to-Toe Distance (Tape Measure Method)
This low-tech approach is quick, simple, and has demonstrated good reliability (4). The goal is to find the maximum distance the great toe can be from the wall while the knee can still touch the wall without the heel lifting.
- Begin with the foot relatively close to the wall and have the individual perform the lunge.
- If successful, move the foot back by approximately one centimeter and repeat.
- Continue moving the foot back until the maximum distance is found just before the heel is forced to lift.
- Measure the distance in centimeters from the tip of the great toe to the wall. A distance of 10-12 cm is often cited as a functional benchmark, though symmetry between limbs is arguably a more important clinical indicator.
2. Tibial Angle (Inclinometer Method)
For greater precision, a digital inclinometer provides an objective angular measurement. This method quantifies the anterior inclination of the tibia relative to vertical.
- Place the inclinometer on the tibial tuberosity and zero the device while the shin is vertical.
- Instruct the individual to lunge forward to their maximum available range, ensuring the heel remains on the ground.
- The inclinometer will display the precise angle of the tibia. A functional range is often considered to be between 35 and 40 degrees.
Using a digital instrument can reduce measurement error and improve objectivity. Clinicians can explore how an inclinometer for physical therapy can enhance their practice with precise, repeatable data.
Avoiding Common Testing Pitfalls
An inaccurate measurement is clinically unhelpful. While the WBLT appears straightforward, compensatory movements can occur if not carefully monitored.
The most common error is allowing the heel to lift off the ground. A second common error is excessive foot pronation, where the medial longitudinal arch collapses and the foot everts. Both are compensatory strategies the body uses to create "apparent" mobility.
To mitigate these errors, use clear and firm verbal cues:
- “Keep your heel glued to the floor.” This is the most critical instruction. Placing a hand or a thin object under the heel can provide tactile feedback.
- “Keep your knee tracking straight over your second toe.” This helps prevent dynamic knee valgus, which is often coupled with foot pronation.
- “Don’t let your arch collapse.” Encourage the maintenance of a stable foot posture throughout the movement.
By standardizing the setup, selecting a consistent measurement tool, and vigilantly monitoring for common compensations, clinicians can perform the WBLT with confidence, yielding valuable, functional data for more effective rehabilitation and performance programming.
Executing Non-Weight-Bearing Ankle Goniometry
While weight-bearing tests are excellent for assessing functional limitations, non-weight-bearing assessments are crucial for diagnostic accuracy. By removing the influence of gravity and muscular compensation, one can isolate the talocrural joint to obtain a clear measurement of its passive range of motion. This approach allows for the identification of the specific source of stiffness, whether it originates from the joint capsule or surrounding soft tissues.
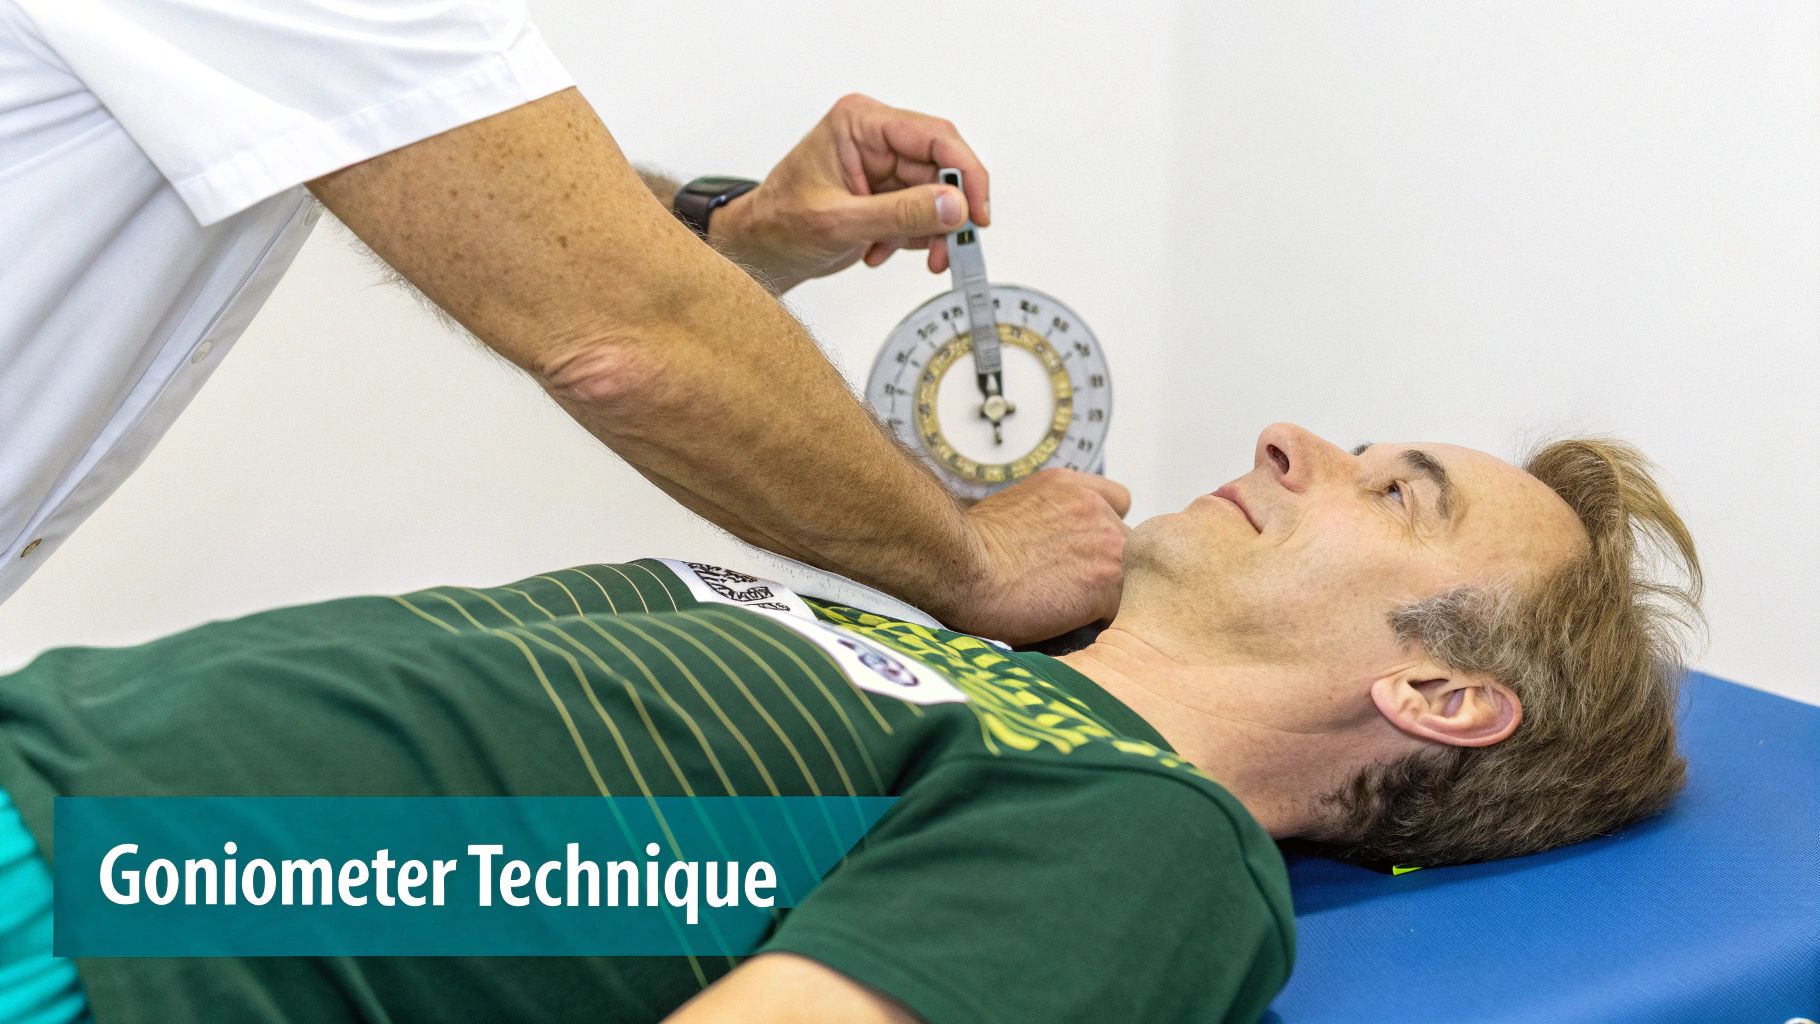
The universal goniometer is the traditional tool for this task. It is a simple yet effective device for quantifying joint angles, and its proficient use is a fundamental clinical skill. Familiarity with goniometry provides objective data to track even subtle changes in joint mobility. To learn more about its applications, you can read about what a goniometer is used for in various clinical contexts.
Precise Goniometer Placement and Alignment
The validity of a goniometric measurement is entirely dependent on correct alignment. A minor error in placement can alter the reading by several degrees, compromising data reliability. For ankle dorsiflexion, the lateral approach is standard due to its high repeatability when performed correctly.
The procedure requires aligning the three components of the goniometer with specific anatomical landmarks:
- Fulcrum (Axis): Placed directly over the center of the lateral malleolus.
- Stationary Arm: Aligned parallel to the longitudinal axis of the fibula, using the fibular head as a proximal reference point.
- Moving Arm: Aligned parallel to the fifth metatarsal.
Once aligned, gently move the foot into maximal dorsiflexion until a firm end-feel is perceived. Applying consistent overpressure is key to measuring the true passive limit of the joint, rather than the point of initial resistance.
Differentiating Between Gastrocnemius and Soleus Tightness
A key advantage of non-weight-bearing assessment is its ability to differentiate between restrictions caused by the two primary plantarflexor muscles. The gastrocnemius crosses both the knee and ankle joints, while the soleus crosses only the ankle. This anatomical difference is exploited to isolate each muscle.
The measurement is performed in two distinct positions.
1. Knee Extended Measurement (Gastrocnemius and Soleus)
With the patient in supine and the knee fully extended, perform the goniometric measurement as described. In this position, the gastrocnemius is under tension. The resulting measurement reflects the combined restriction from the gastrocnemius, soleus, and joint capsule.
2. Knee Flexed Measurement (Soleus Only)
Next, have the patient flex the knee to approximately 90 degrees. This places the gastrocnemius on slack, effectively removing its influence on ankle motion. Remeasure dorsiflexion in this position.
If ankle dorsiflexion increases significantly with the knee flexed, it is highly probable that the gastrocnemius muscle is the primary restricting factor. If the range of motion remains limited in both positions, the restriction is more likely located in the soleus muscle or the talocrural joint capsule itself (5).
Keys to Achieving Reliable and Repeatable Data
Inconsistent technique will invalidate clinical data. To ensure that non-weight-bearing measurements are reliable across sessions, the process must be rigorously standardized.
- Subtalar Neutral: Before measuring, gently guide the foot into a subtalar neutral position. This prevents forefoot pronation or supination from contributing "false" mobility and ensures the measurement reflects pure talocrural motion.
- Consistent Overpressure: The force applied to move the ankle into dorsiflexion should be consistent with each measurement. The goal is to reach a firm, non-painful end-range. This skill is refined through practice.
- Stabilize the Leg: Use the non-dominant hand to stabilize the distal tibia and fibula. This prevents lower leg rotation or elevation, which would invalidate the measurement.
By adhering to a meticulous protocol, goniometry can be used to accurately identify the root cause of an ankle mobility deficit. This precision allows for more targeted interventions, whether that involves stretching the gastrocnemius, releasing the soleus, or mobilizing the joint capsule.
The Clinician's Toolkit: From Goniometers to Smartphone Apps
The choice of tool for measuring ankle dorsiflexion involves a balance of practicality, precision, and the specific demands of the clinical environment.
For decades, the universal goniometer has been the standard instrument in physiotherapy due to its low cost and accessibility. However, its effectiveness is entirely dependent on the skill of the clinician. This manual method can be subject to user error, as slight variations in fulcrum placement or arm alignment can create measurement variability, complicating the tracking of patient progress over time.
The Rise of Digital Precision
To address the subjectivity of manual tools, digital inclinometers and smartphone applications have gained popularity. These devices provide an objective, numerical readout, reducing guesswork. When placed on the tibial crest during a weight-bearing lunge test, a digital device provides a direct, quantifiable angle.
This shift toward digital measurement enhances the standard of care. Numerous studies have demonstrated that digital tools can significantly improve both intra-rater (single tester) and inter-rater (multiple testers) reliability (6). When different clinicians within a practice can obtain consistent readings for the same patient, the quality of collaborative care is elevated.
The primary advantage of digital tools is their capacity to deliver objective, repeatable data. This minimizes measurement variability and provides a solid baseline for tracking true physiological change.
From Dedicated Devices to Pocket-Sized Power
The evolution of these tools has made precise measurement more accessible than ever. While dedicated, medical-grade digital inclinometers offer validated accuracy, the technology within modern smartphones is also highly capable. Many applications utilize the phone's built-in accelerometer to function as a reliable inclinometer for measuring ankle dorsiflexion.
This accessibility is a significant benefit for clinicians in diverse settings, from fully equipped clinics to sideline assessments. The key is to select a reputable application and use it consistently to ensure measurement integrity.
Here is a brief comparison to aid in tool selection:
| Tool | Pros | Cons |
|---|---|---|
| Universal Goniometer | Inexpensive, widely available, no batteries needed. | Prone to user error, requires significant practice for reliability. |
| Digital Inclinometer | Highly accurate and reliable, objective readout, easy to use. | Higher initial cost, requires batteries/charging. |
| Smartphone App | Extremely convenient, low or no cost, always accessible. | App quality varies, potential for lower accuracy than medical devices. |
The field continues to advance, with new instruments being developed to further standardize measurement. For instance, the Instrument-Assisted Range of Motion (IAROM) device was designed to provide valid measurements by applying a standardized force. A 2011 study found its Intraclass Correlation Coefficient (ICC) for reliability was 0.924, with a Minimal Detectable Change (MDC) of 5.6 degrees (7). This method not only measures the angle but can also provide data on ankle joint stiffness.
Ultimately, the best tool is one that aligns with your clinical workflow, budget, and commitment to consistency. Whether using a traditional goniometer or a digital device, mastery of the chosen instrument is what enables high-quality patient care.
For a deeper analysis of available options, explore our comprehensive guide on range of motion measurement tools.
Answering Your Top Questions About Ankle Dorsiflexion Measurement
Even with a standardized protocol, clinical questions often arise. Interpreting the numbers and understanding their significance is what elevates a good assessment to a great one. Here are answers to some of the most common questions from clinicians.
What Are the Normal Ranges for Ankle Dorsiflexion?
A common question is, "What is a 'normal' value?" The answer depends on the measurement method. While there is no single universal value, evidence-based benchmarks provide useful clinical targets.
For the Weight-Bearing Lunge Test (WBLT), commonly cited functional goals include:
- A tibial angle of 35 to 40 degrees measured with an inclinometer.
- A wall-to-toe distance of over 10 centimeters (approximately 4 inches).
For non-weight-bearing goniometry, a passive range of 10 to 20 degrees with the knee extended is widely accepted as a normal range (8). However, the most clinically significant finding is often symmetry between limbs. A difference of more than 2 to 4 degrees or 2 centimeters between sides is generally considered meaningful and warrants further investigation for potential mobility deficits or injury risk factors (1).
How Can I Differentiate Between a Gastrocnemius or Soleus Restriction?
This is a classic diagnostic challenge solved with non-weight-bearing goniometry. The key is to measure passive dorsiflexion in two positions to isolate the influence of the biarticular gastrocnemius muscle.
First, measure the ankle's passive range with the patient's knee fully extended. This position places the gastrocnemius on tension, and the measurement reflects the combined restriction from the gastrocnemius, the deeper soleus, and the joint capsule.
Next, have the patient flex the knee to 90 degrees and remeasure. Bending the knee introduces slack in the gastrocnemius, effectively removing its restrictive influence.
A significant increase in range of motion when the knee is bent strongly indicates that the gastrocnemius is the primary limiting factor. If the range remains restricted in both positions, the limitation likely originates from the soleus or the talocrural joint capsule itself (5).
This differential test is a powerful clinical tool, as it directs treatment—whether manual therapy or stretching—to the specific structure at fault.
What Is the Minimal Detectable Change I Should Look For?
When re-assessing a patient, how much improvement is required to be confident it represents a true change rather than measurement error? This is defined by the Minimal Detectable Change (MDC). It is the smallest change that can be considered real, exceeding the threshold of measurement variability.
Knowing the MDC for a given tool and protocol allows clinicians to track progress with confidence and demonstrate treatment efficacy. These values vary based on the instrument and method:
- WBLT with an Inclinometer: The MDC at a 95% confidence level (MDC95) is typically reported to be between 2.1 and 3.5 degrees (6).
- WBLT with a Tape Measure: This method has an MDC95 of approximately 1.1 to 1.7 centimeters (4).
- Non-Weight-Bearing Goniometry: This method can exhibit more variability, with an MDC often reported in the 5 to 7 degree range (9).
In practice, if a patient's tibial angle improves by 4 degrees on the WBLT as measured by an inclinometer, you can be confident this is a true physiological change because it exceeds the MDC. Using instruments with a lower MDC, such as digital devices, enables the detection of smaller but still meaningful improvements in patient mobility.
References
- Macrum E, Bell DR, Boling M, Lewek M, Padua D. Effect of limiting ankle-dorsiflexion range of motion on lower extremity kinematics and muscle activation patterns during a squat. J Sport Rehabil. 2012;21(2):144-50.
- Elveru RA, Rothstein JM, Lamb RL. Goniometric reliability in a clinical setting. Subtalar and ankle joint measurements. Phys Ther. 1988;68(5):672-7.
- Bennell KL, Talbot RC, Wajswelner H, Techovanich W, Kelly DH, Hall AJ. Intra-rater and inter-rater reliability of a weight-bearing lunge measure of ankle dorsiflexion. Aust J Physiother. 1998;44(3):175-80.
- Dennis RJ, Finch CF, Elliott BC, Farhart PJ. The reliability of musculoskeletal screening tests used in cricket. Phys Ther Sport. 2008;9(1):25-33.
- Magee DJ. Orthopedic Physical Assessment. 6th ed. St. Louis, MO: Elsevier Saunders; 2014.
- Konor MM, Morton S, Eckerson JM, Grindstaff TL. Reliability of three measures of ankle dorsiflexion range of motion. Int J Sports Phys Ther. 2012;7(3):279-87.
- Moseley AM, Adams R. Measurement of passive ankle dorsiflexion: procedure and reliability. Aust J Physiother. 1991;37(3):175-81.
- Norkin CC, White DJ. Measurement of Joint Motion: A Guide to Goniometry. 5th ed. Philadelphia, PA: F.A. Davis Company; 2016.
- Youdas JW, Bogard CL, Suman VJ. Reliability of goniometric measurements and visual estimates of ankle joint active range of motion in adolescents and adults. Physiother Theory Pract. 1993;9(2):75-83.
At Meloq, we design digital measurement tools that give clinicians the objective data they need to make confident decisions. Our EasyAngle digital goniometer and inclinometer provides 1-degree accuracy, helping you reliably track progress and demonstrate the effectiveness of your care with data you can trust.

Featured Product
EasyAngle Digital Goniometer
Measure range of motion with clinical precision. CE certified, Bluetooth connected.
Learn More