
A Clinician's Guide on How to Test Grip Strength Accurately
Team Meloq
Autor
To test grip strength, you use a device called a hand dynamometer to measure the maximum force your hand and forearm muscles can generate. The standard procedure involves sitting with your elbow bent at 90 degrees, squeezing the device as hard as possible for a few seconds, and repeating the test multiple times to obtain a reliable average or peak score (1).
Why Mastering Grip Strength Testing Matters
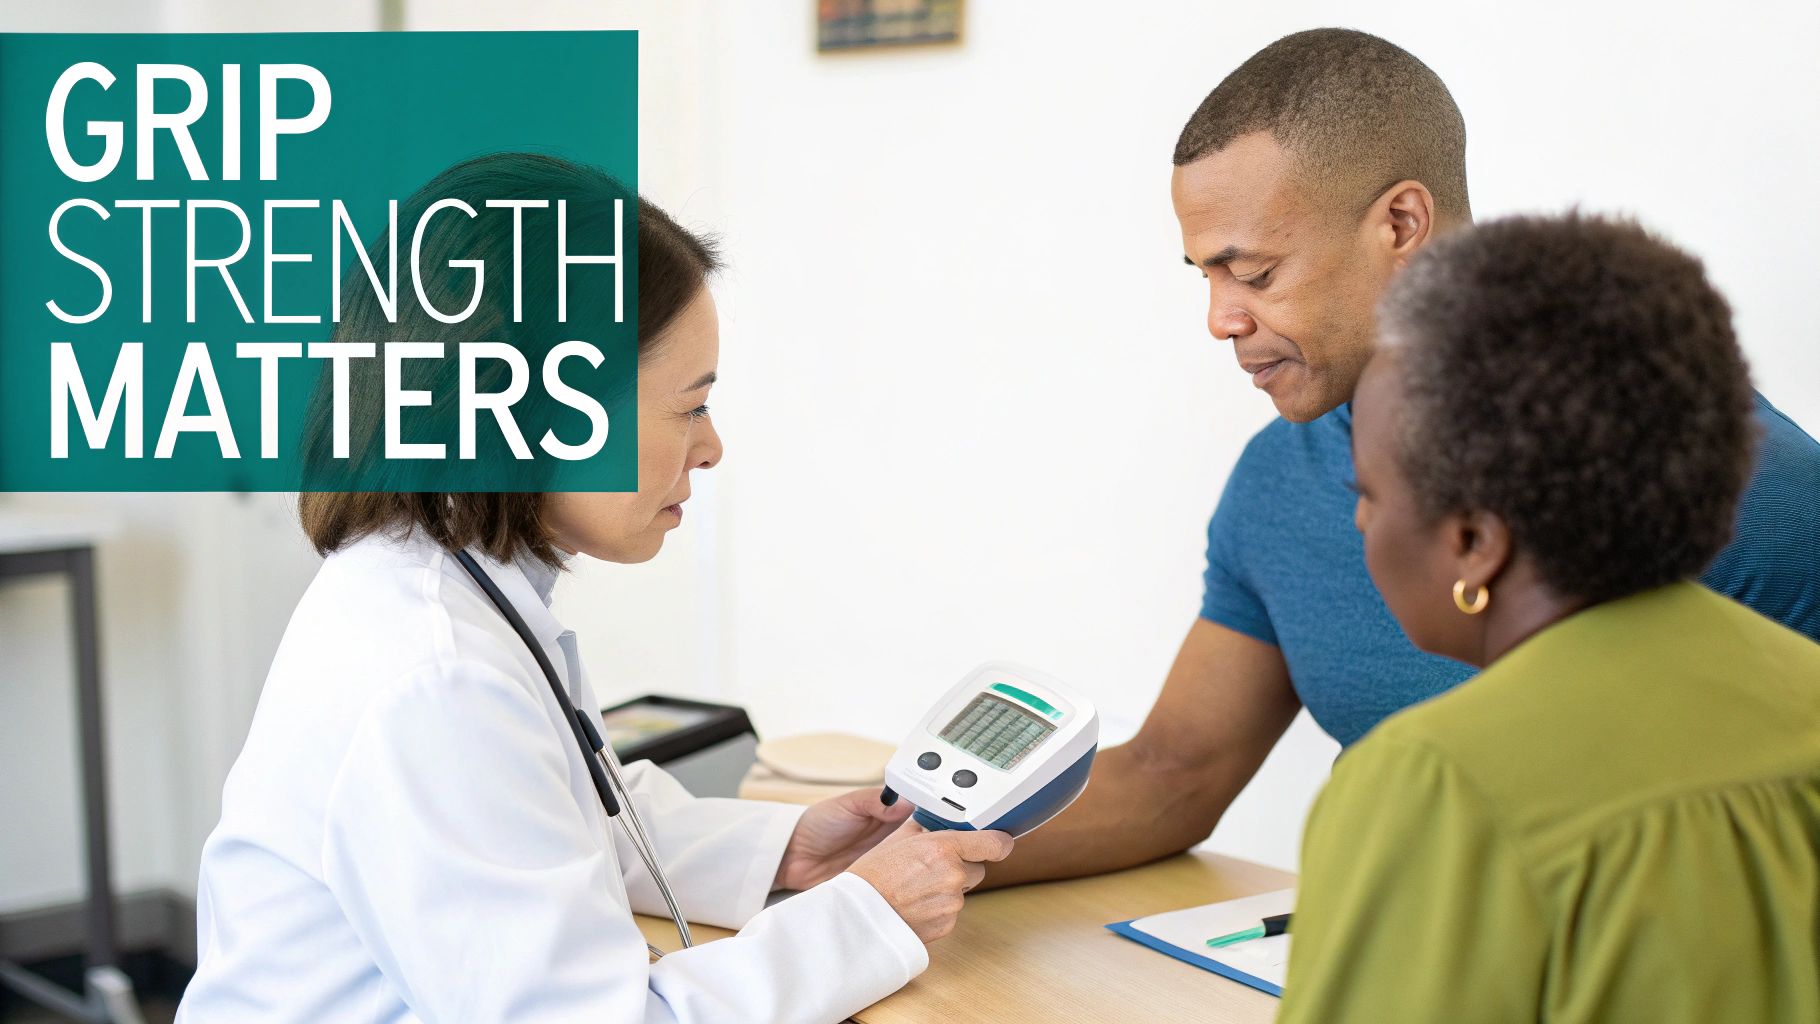
Hand grip strength is more than a firm handshake; it is a scientifically validated biomarker of overall health and physical function (2). For clinicians, physical therapists, and performance coaches, knowing how to test grip strength accurately provides a window into a person’s physiological state. It offers an objective metric that moves assessment beyond subjective descriptions to quantifiable, evidence-based data.
This simple, non-invasive test offers profound insights. It serves as a powerful indicator of general muscle condition, which is significant because muscle health is intrinsically linked to everything from metabolic regulation to mobility and balance.
A Critical Tool for Clinical Assessment
Weak grip strength is not just an isolated issue in the hand or forearm; it often signals systemic problems. Research has established strong links between low grip strength and a host of adverse health outcomes. It is a key diagnostic criterion for conditions like sarcopenia—the age-related loss of muscle mass and function—and frailty in older adults (3).
Its predictive power is so significant that it has been proposed as a "new vital sign" in medical practice. In fact, studies have shown that a person's grip strength can be a more effective predictor of all-cause and cardiovascular mortality than traditional metrics like blood pressure (4). This makes it an invaluable screening tool in a wide range of clinical settings.
A weakening grip strength is associated with high mortality rates in the case of serious illness onset, suggesting that reduced muscle strength is an important marker of frailty and the limited capacity to cope with illness (2).
Driving Better Rehabilitation and Performance Outcomes
Beyond diagnostics, precise grip strength measurement is fundamental to tracking progress and making informed decisions in both rehabilitation and sports. For an athlete recovering from an upper limb injury, objective data on grip strength helps determine a safe and effective return-to-sport timeline. For a post-operative patient, seeing grip strength numbers improve provides clear, motivating evidence of recovery and confirms that the treatment plan is effective.
By mastering standardized protocols, clinicians can ensure their data is reliable and comparable over time. This consistency allows for:
- Accurate Progress Tracking: Objectively measure if a rehabilitation program is effective.
- Informed Clinical Decisions: Adjust treatment plans based on quantitative data, not guesswork.
- Enhanced Patient Motivation: Show patients their tangible improvements, which can boost engagement and adherence.
Ultimately, knowing how to test grip strength correctly is not just about collecting a number. It is about leveraging a powerful piece of data to deliver superior care, guide patient journeys, and optimize physical performance. For a deeper understanding of the tools themselves, you can explore detailed explanations of how a dynamometer works. This foundation sets the stage for the practical, step-by-step protocols that follow.
Preparing for a Consistent and Reliable Test
To achieve repeatable results when you test grip strength, a flawless setup is non-negotiable. The validity of your data hinges on getting the preparation right, starting with your equipment and then locking in a standardized patient position. This careful groundwork ensures every measurement is a true reflection of the individual's maximal strength.
First, let's discuss the device itself. While traditional hydraulic dynamometers have been used for years, modern digital dynamometers can offer enhanced accuracy and consistency. They remove the potential for parallax error when reading a moving needle and provide precise, quantifiable data—which is essential for tracking small but meaningful changes over time.
Before starting a testing session, a quick calibration check is recommended. This small step builds confidence in the collected data and upholds the scientific rigor of your assessment. You can get a deeper dive into different types of devices in our guide to force measurement equipment. It's also helpful to remember that these measurements often fit into a larger clinical picture, such as what might be documented in a home health care assessment form.
Standardizing Patient Positioning
Once your equipment is ready, the next critical element is patient positioning. Even a slight deviation from a standard posture can affect results and compromise the test's validity. The most widely accepted protocol—recommended by organizations like the American Society of Hand Therapists (ASHT)—provides a clear and repeatable setup (1).
This standard posture creates a stable base and isolates the action to the forearm and hand muscles, preventing compensation from larger, stronger muscle groups. The goal is to create an identical testing environment every time, so you know any changes in strength are physiological changes, not variations in technique.
The ASHT guidelines specify:
- Seating: The individual should be sitting in a straight-backed chair, feet flat on the floor.
- Shoulder: The shoulder should be adducted (tucked in close to the body) and neutrally rotated.
- Elbow: The elbow must be flexed to exactly 90 degrees.
- Forearm & Wrist: Both should be held in a neutral position, with no flexion, extension, or deviation.
Adhering to this standardized posture is not just about following rules; it is about ensuring the data you collect is reliable and comparable. Allowing a patient to brace their arm against their body or a table, for example, can artificially inflate the reading and compromise the entire assessment.
Adjusting for the Individual
With your patient correctly positioned, the final preparation step is adjusting the dynamometer handle to fit their hand. This often-overlooked detail directly impacts how much force someone can generate. If the grip is sized incorrectly, you are likely to obtain an underestimation of their true strength.
The ideal handle position allows the middle phalanx (the middle bone in the fingers) to rest comfortably on the handle. For most adults, this usually corresponds to the second or third handle position on a standard dynamometer.
Documenting the handle position is as important as recording the strength value itself. To maintain consistency for future tests, you must use the same setting every time you re-test that person. This meticulous attention to detail is what separates a casual measurement from a clinical-grade assessment.
Having a solid baseline also allows for meaningful comparisons to population norms. For instance, large-scale studies provide invaluable context, showing that grip strength typically peaks in the 30-39 age group before it starts to gradually decline (5). Read the full research about these population findings.
Executing the Test with a Standardized Protocol
Now that everything is set up and positioned correctly, it is time for the test itself. This is where your careful preparation ensures the data you capture is a true reflection of the individual's maximal effort. A standardized protocol is not just about consistency; it is about creating a controlled environment where the only variable is genuine grip strength.
The actual test is straightforward, but sticking to the protocol is non-negotiable. The goal is to obtain a maximal voluntary contraction, which starts with clear, simple instructions. Direct verbal cues are generally most effective.
Before giving the "squeeze" command, a quick mental check of these preparatory steps is essential.
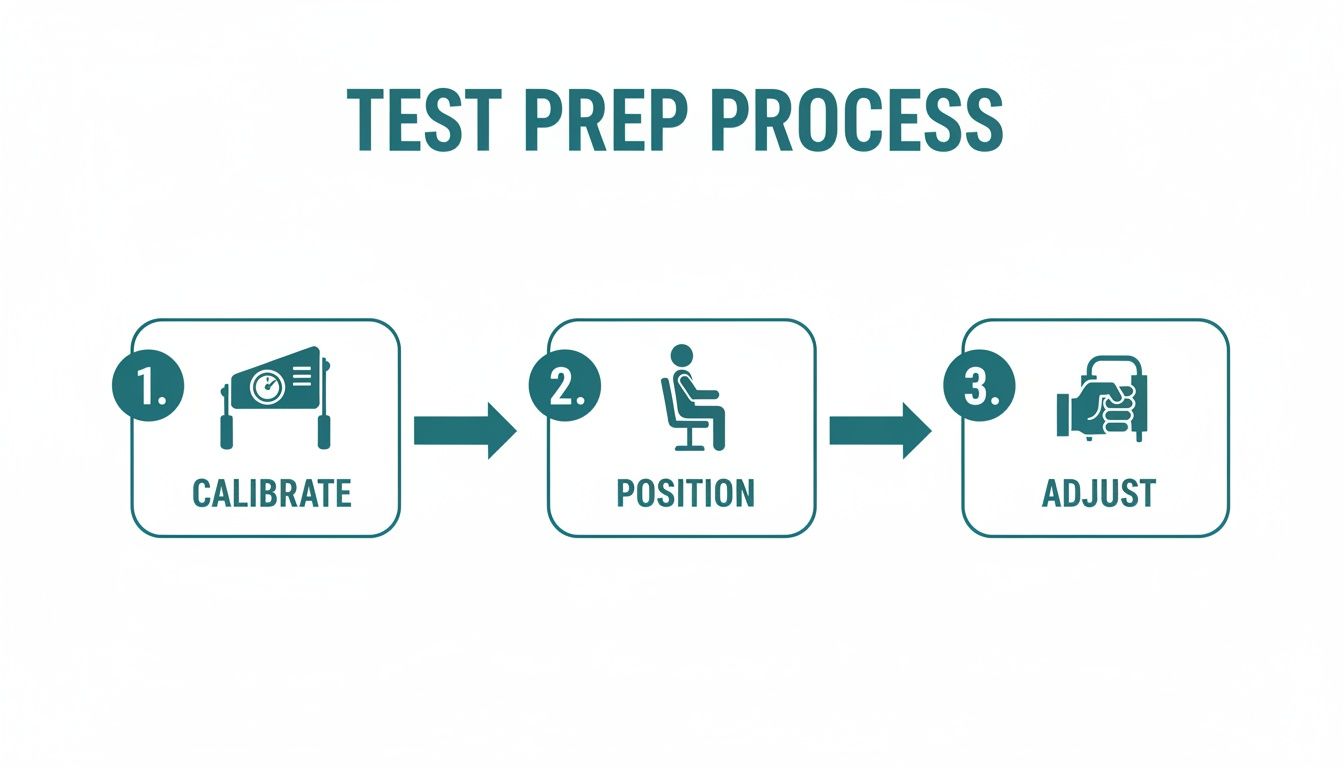
This visual is a great reminder of the three pillars—equipment, positioning, and adjustment—that must be locked in before every single trial.
Verbal Cues and Test Repetitions
The instructions you provide can significantly impact the test. Keep them simple and encouraging.
"When I say 'go,' I want you to squeeze this handle as hard as you possibly can for a few seconds. Ready... Go! Squeeze, squeeze, squeeze... and relax."
A cue like this is easy to understand and consistently prompts the maximal effort needed. The widely accepted clinical standard involves three separate trials for each hand (1). This approach provides reliable data without causing excessive fatigue. Many clinicians prefer starting with the non-dominant hand, as it allows the individual to become familiar with the test before exerting maximal effort on their stronger side.
Between each attempt, a proper rest period is crucial. Clinical guidelines and research suggest a rest interval of about 60 seconds between each squeeze (1). This allows the neuromuscular system sufficient time to recover, ensuring fatigue does not skew the results of subsequent trials. To learn more about the mechanics of these devices, our guide on how to use a dynamometer is a great resource.
Recording and Interpreting Trial Data
Once you have three good measurements for each hand, you need to decide which value to record. There are two primary, scientifically-backed methods. The key is to choose one and use it consistently for that client.
- Mean of Three Trials: Taking the average of the three squeezes provides a stable, representative value of their typical maximal strength. It helps smooth out minor variations between efforts.
- Highest Value: The other common practice is to record the single best score from the three trials. This captures their peak force-generating capacity during that session.
Neither method is inherently superior, but consistency is vital, especially for tracking progress over time. Whichever method you choose, ensure you document it with the results. That way, when you re-test weeks or months later, you are making a valid comparison.
Watching for Compensatory Movements
During the squeeze, it is important to observe the individual closely. People, especially those in pain or with significant weakness, may unconsciously use compensatory movements to achieve a better score. These can involve larger muscle groups and invalidate the test.
Keep an eye out for these common compensations:
- Body English: The person leans their whole body into the squeeze.
- Wrist Flexion/Extension: The wrist deviates from the neutral position.
- Arm Movement: The elbow moves away from the 90-degree angle or the shoulder becomes involved.
- Breath Holding (Valsalva Maneuver): Encourage steady breathing to avoid unnecessary spikes in blood pressure.
If you spot any of these, gently correct their posture and repeat the trial after the rest period. Your job is to ensure the recorded number is a pure measure of grip strength, as this is the only way to build a solid foundation for clinical interpretation.
Making Sense of the Numbers: Interpreting Your Results
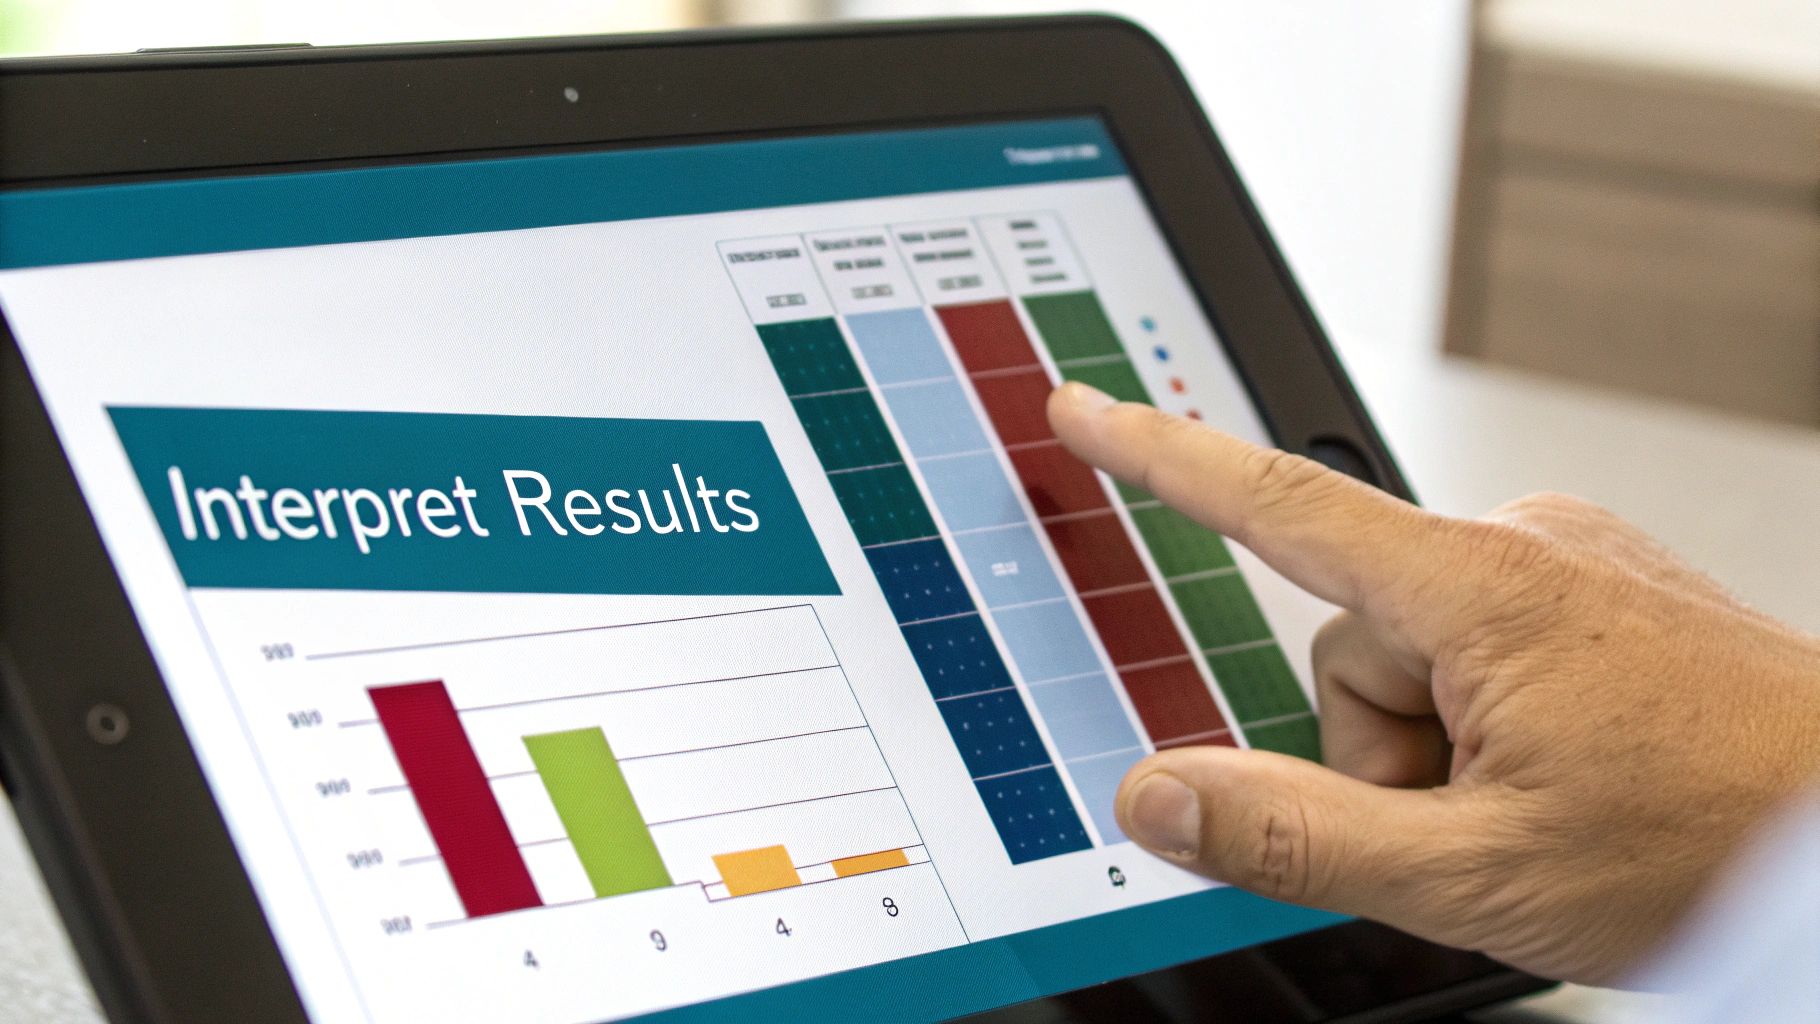
Collecting raw data when you test grip strength is only half the battle. The real clinical value comes from turning those numbers into meaningful insights that guide treatment, set realistic goals, and demonstrate progress.
A number in isolation—say, 35 kg—means very little on its own. However, when placed against a backdrop of established normative data, it tells a powerful story about your patient or athlete's health.
Contextualizing with Normative Data
This is where large-scale population studies become one of your most valuable tools. By comparing an individual's score to the average for their specific age and gender, you can get a clear picture of their strength level. You can quickly see if they fall within a healthy range, are significantly below average, or possess elite-level strength.
Normative values provide the essential context for your interpretation. These benchmarks are gathered from testing thousands of people, giving us a robust understanding of what "typical" grip strength looks like across a lifetime. Factors like age, gender, and hand dominance play a major role. As a general rule, grip strength peaks in early adulthood before beginning a gradual decline from middle age onward.
The table below offers a snapshot of these values, pulled from comprehensive studies. It is a quick reference to see how your client's numbers stack up against their peers.
Grip Strength Normative Values by Age and Gender (Dominant Hand, kg)
| Age Group | Mean Grip Strength (Male, kg) | Mean Grip Strength (Female, kg) | Data Source Reference |
|---|---|---|---|
| 20-29 | 49.7 | 30.1 | Bohannon et al., 2018 (6) |
| 30-39 | 48.9 | 29.5 | Bohannon et al., 2018 (6) |
| 40-49 | 45.4 | 26.8 | Bohannon et al., 2018 (6) |
| 50-59 | 41.1 | 23.6 | Bohannon et al., 2018 (6) |
| 60-69 | 35.9 | 20.7 | Bohannon et al., 2018 (6) |
| 70-79 | 28.3 | 16.5 | Bohannon et al., 2018 (6) |
This data allows you to frame conversations with your clients more effectively. You can clearly explain to a 65-year-old man why his score of 28 kg might signal a need for a targeted strengthening program, putting it into the context of maintaining functional independence as he ages.
Analyzing Side-to-Side Asymmetry
Beyond comparing to population norms, a crucial piece of the puzzle is looking at the individual's own data—specifically, the difference between their left and right hands. For most people, it is normal for the dominant hand to be stronger.
A widely accepted rule of thumb in physiotherapy and sports rehabilitation is the 10% rule. This suggests that the dominant hand should be roughly 10% stronger than the non-dominant side (7).
Here is a real-world example: A right-handed client measures 40 kg with their right hand and 37 kg with their left. That 3 kg difference is only 7.5% of the dominant score, which falls comfortably within the expected 10% range. This is a sign of healthy, normal balance.
However, a discrepancy significantly greater than 10% can be a red flag. This might point to a unilateral weakness from an injury, a neurological issue, or a functional imbalance that needs a closer look. Conversely, if the non-dominant hand is stronger, it could indicate overcompensation for an issue on the dominant side.
Tracking Progress Over Time
Perhaps the most powerful use of grip strength testing is tracking objective data over the long haul. A single test is a snapshot in time; a series of tests over weeks or months tells a compelling story of progress, stagnation, or decline.
This is where your meticulous documentation and consistent testing protocols truly shine. By re-testing under the exact same conditions, you can:
- Objectively Prove Progress: Showing a patient their grip strength has increased from 22 kg to 27 kg over six weeks of therapy is incredibly motivating. It is concrete proof that your interventions are working.
- Identify Plateaus: If progress stalls, the data will show it immediately. This provides an opportunity to reassess your treatment plan and make adjustments before your patient gets discouraged.
- Build Data-Driven Plans: The numbers empower you to create highly specific, goal-oriented rehabilitation programs. You can find more details on using these numbers in our deep dive into dynamometer grip strength norms.
When you know how to make sense of the numbers, grip testing transforms from a simple measurement into a dynamic clinical tool that lets you assess, diagnose, and manage with greater precision and confidence.
Beyond the Basics: Advanced Applications and Common Pitfalls
Once you have mastered the standardized protocol for testing grip strength, you can explore its wider applications and, just as importantly, learn how to sidestep common mistakes that can compromise your data. Grip strength is more than a number for hand function; it is a powerful indicator in specialized clinical and performance settings.
Even experienced professionals can make small errors that compromise the quality of their measurements. Knowing these advanced concepts and pitfalls is what elevates a routine test into a genuinely insightful clinical assessment. For instance, in orthopedics, preoperative grip strength can be a significant predictor of post-operative complications. In geriatrics, it is a cornerstone for identifying frailty and the risk of functional decline.
Specialized Clinical and Performance Applications
Moving past general health screening, grip strength data provides critical insights in specific contexts. The objective numbers you obtain can steer crucial decisions, helping you tailor interventions directly to an individual's needs.
When you think about the broader clinical uses, fields like musculoskeletal physiotherapy immediately come to mind. Practitioners in this field regularly rely on grip strength to track patient progress and set meaningful functional goals during rehabilitation.
Here are a few ways this plays out in practice:
- Athletic Return-to-Play: For an athlete returning from an upper limb injury, achieving a grip strength that is within 90-100% of their uninjured side is often a key criterion for a safe return to sport.
- Nutritional Status: In a hospital setting, low grip strength can be a red flag for malnutrition or sarcopenia, especially for patients with chronic illnesses.
- Surgical Outcome Prediction: Compelling research suggests that patients with better preoperative grip strength tend to have better surgical outcomes, including shorter hospital stays. It serves as a solid marker of their overall physiological resilience.
To put these applications in context, a landmark analysis of twelve British studies provided valuable life-course norms. It showed that males typically peak at a median of 51 kg and females at 31 kg. This data helps define clinical weakness as a score that is roughly 2.5 standard deviations below the average for a healthy young adult, providing a clear clinical threshold (8). You can explore the life-course centiles from the study here.
Navigating Common Testing Pitfalls
You can have the most perfect protocol written down, but tiny mistakes in execution can render your results unreliable. Being aware of these common errors is the first step to eliminating them from your practice.
One of the biggest culprits is inconsistent patient positioning. If a client braces their arm against a table during one test but not the next, you are not comparing like with like. That standardized seated posture must be enforced, every single time.
Another subtle error is rushed or inconsistent verbal commands. The tone and specific words you use can influence how much effort a person exerts.
A half-hearted "go ahead and squeeze" will likely elicit a different result than an encouraging, firm "Squeeze as hard as you can! Go, go, go!" Consistent motivation is part of the protocol.
Finally, poor equipment management is a silent data killer. Forgetting to note which handle position was used or skipping regular calibration checks introduces variability that has nothing to do with the client's actual strength. Meticulous documentation and device maintenance are not just best practices; they are non-negotiable for reliable tracking over time.
Your Top Grip Strength Testing Questions, Answered
Even with a rock-solid protocol, real-world questions and scenarios are guaranteed to arise in the clinic. It is one thing to know the steps for testing grip strength, but another to troubleshoot on the fly. That is where true confidence in your assessments comes from.
Here are some of the most common questions from clinicians who are integrating regular grip strength testing into their practice, with clear, evidence-based answers.
How Often Should I Re-Test a Patient's Grip Strength?
There is no single "right" answer—the ideal testing frequency hinges on the clinical goal and the patient's specific situation. However, we can lean on established principles.
In a post-operative rehabilitation setting, an initial evaluation followed by re-testing every 2-4 weeks is often sufficient to track recovery. For athletes in a strength and conditioning program, monthly or quarterly checks are great for monitoring progress.
When it comes to geriatric care, where we are often monitoring for functional decline, testing every 3-6 months can provide valuable data on conditions like sarcopenia. The most important thing, regardless of the timeline, is consistency. Always use the same protocol to ensure your data is comparable and meaningful over time (1).
What Do I Do If a Patient Reports Pain During the Test?
Simple: stop. Pain is a critical clinical finding, not something to push through. Asking a patient to "power through it" can exacerbate an injury and, just as importantly, invalidate the measurement of their true maximal strength.
When pain occurs, stop the attempt immediately. Document the presence, location, and intensity of the pain. The resulting number is not useless—it is just a different kind of data. It reflects their pain-limited strength, not their maximal voluntary contraction, which is still valuable information.
From there, you can test the unaffected hand if appropriate. Only re-test the painful hand once the underlying issue has been addressed and they can perform the test without pain.
Can Grip Strength Help Assess Upper Limb Nerve Injuries?
Absolutely. It is a go-to objective measure for tracking motor deficits from nerve injuries like carpal or cubital tunnel syndromes. A significant drop in strength compared to normative data or their contralateral side provides hard evidence of a motor deficit.
You can even get more specific. Certain weakness patterns can be a huge clue for a differential diagnosis. For instance, if you notice that an ulnar nerve issue is disproportionately weakening grip in the fourth and fifth fingers, that is a key finding. Regular, standardized testing gives you objective data to track nerve recovery or degeneration, helping you guide treatment and evaluate if your interventions—be it splinting, therapy, or surgery—are effective.
How Important Is the Dynamometer Handle Position?
It is critical. The handle position is absolutely essential for standardization and obtaining data you can trust.
The American Society of Hand Therapists (ASHT) often recommends the second handle position as a starting point, but the real goal is to find the position that allows that specific person to generate the most force (1).
Whatever you choose, you must use that same handle position for every single re-test with that person. It is essential to document this in your clinical notes right alongside the force measurement. Consistency is what allows for accurate tracking over time, ensuring that the changes you see are from real physiological adaptations, not measurement error.
At Meloq, our mission is to give clinicians the tools to replace subjective guesswork with objective, quantifiable data. The EasyForce digital dynamometer is designed from the ground up to deliver the precision and consistency you need for clinical-grade assessments, empowering you to make more informed decisions and drive better outcomes. Explore Meloq's solutions for accurate strength measurement.

Producto destacado
Dinamómetro digital EasyForce
Pruebas de fuerza muscular de mano con un 99 % de precisión. Utilizado en más de 40 estudios revisados por pares.
Más información